


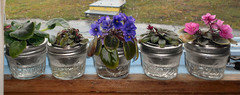
Mini Wick Pot Solution Found!
Robin
13 years ago
Featured Answer
Comments (90)

Bill
8 years ago
Rosie1949
8 years agoRelated Professionals
Derry Landscape Architects & Landscape Designers · Ferndale Landscape Architects & Landscape Designers · Fort Lee Landscape Architects & Landscape Designers · Severn Landscape Architects & Landscape Designers · South Orange Landscape Architects & Landscape Designers · Harvey Landscape Architects & Landscape Designers · Addison Landscape Contractors · East Chicago Landscape Contractors · Fishers Landscape Contractors · Franklin Landscape Contractors · Lakeville Landscape Contractors · Miller Place Landscape Contractors · Petaluma Landscape Contractors · Ringwood Landscape Contractors · River Ridge Landscape Contractors
westerly pacific
8 years ago PRO
PROMona Mathews
8 years agoirina_co
8 years agoRosie1949
8 years agoirina_co
8 years ago
bragu_DSM 5
8 years agolast modified: 8 years agoirina_co
8 years agoRosie1949
8 years agoJulia (1meanmop)
8 years agoirina_co
8 years agoRosie1949
8 years agoirina_co
8 years agoRosie1949
8 years agoirina_co
8 years agoRosie1949
8 years ago
AnneCecilia z5 MI
8 years agoirina_co
8 years agoRosie1949
8 years agolast modified: 8 years agoirina_co
8 years agolfs222
7 years ago
bttrflii
7 years agoirina_co
7 years agobragu_DSM 5
7 years agoKim
7 years agolast modified: 7 years ago
Karen Shirley
7 years agoRosie1949
7 years agoskysong4
7 years agolast modified: 7 years ago
Robin
7 years agoKaren Shirley
7 years agoskysong4
7 years agoskysong4
7 years agoKaren Shirley
7 years agoskysong4
7 years agohappystamps
6 years agoskysong4
6 years agoRosie1949
6 years agohappystamps
6 years agoRosie1949
6 years agohappystamps
6 years agoRosie1949
6 years agohappystamps
6 years ago
joyfulsu
6 years agoRosie1949
6 years ago
Andrei Scherbak
5 years agoirina_co
5 years agoAndrei Scherbak
5 years agoRosie1949
5 years agoirina_co
5 years ago


Related Stories
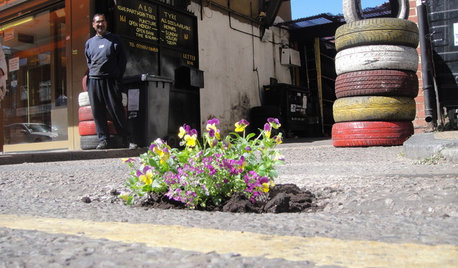
FUN HOUZZGardening Happiness Found ... in Potholes
Imperfections in roads and sidewalks become miniature works of art — and unlikely sources of joy — at the hands of a London gardener
Full Story
ORGANIZINGOutside the Box: 18 Unconventional Storage Solutions
You might never think to use household standards in creative ways like these, but you’ll be glad we did
Full Story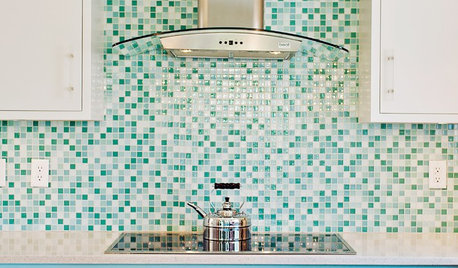
KITCHEN DESIGN9 Popular Stovetop Options — Plus Tips for Choosing the Right One
Pick a stovetop that fits your lifestyle and your kitchen style with this mini guide that covers all the basics
Full Story
GARDENING GUIDESHow to Keep Your Citrus Trees Well Fed and Healthy
Ripe for some citrus fertilizer know-how? This mini guide will help your lemon, orange and grapefruit trees flourish
Full Story
KITCHEN DESIGNPopular Cabinet Door Styles for Kitchens of All Kinds
Let our mini guide help you choose the right kitchen door style
Full Story
LIFEA Quick Downsizing Quiz for the Undecided
On the fence about downsizing? We help you decide whether that fencing should encircle a mansion or a mini trailer
Full Story
HEALTHY HOME18 Ways to Allergy-Proof Your Home
If you're itching to reduce allergy symptoms, this mini guide to reducing allergens around the house can help
Full Story
THE HARDWORKING HOMEMake the Most of Your Window Wall
The Hardworking Home: Put that area under your window to work as a mini library, a crash pad, a workspace, storage and more
Full Story
KITCHEN DESIGNCreate Your Own Checklist for a Well-Stocked Kitchen
Personalize the kitchen with your own must-haves from our list of top cooking tools, small appliances, pots, pans and more
Full Story
FARM YOUR YARDHow to Grow Vegetables in Containers
Get glorious vegetables and fruits on your patio with a pro’s guidance — including his personal recipe for potting mix
Full Story

RobinOriginal Author