


Cuttings into plants
lathyrus_odoratus
14 years ago
Related Stories
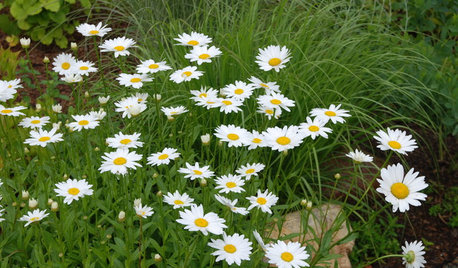
FLOWERSBest Cutting-Garden Beauties for Late Summer
Pick blooms bursting with color or in classic white for bouquets to give away or keep all to yourself
Full Story
GARDENING GUIDES7 Ecofriendly Gardening Ideas That Also Cut Chore Time
Spend less time weeding, less money watering and more moments just sitting back and enjoying your healthy garden
Full Story
HOME OFFICESQuiet, Please! How to Cut Noise Pollution at Home
Leaf blowers, trucks or noisy neighbors driving you berserk? These sound-reduction strategies can help you hush things up
Full Story
HOLIDAYSHow to Care for Your Christmas Tree
Keep your tree looking lush until the last ornament is packed away with these tips for watering, using stands and more
Full Story
LANDSCAPE DESIGNIs Your Garden Cut Out for Matisse Inspiration?
Look to the artist’s paper collages for a creative and easy approach to garden design
Full Story
BUDGET DECORATINGSimple Pleasures: Treat Yourself to Cut Flowers
Enjoy priceless beauty with just a few inexpensive stems — and you don’t need fancy vases, either
Full Story
DECORATING GUIDESSpring Style: Fresh-Cut Flowers for Every Room
Graceful, lively or dramatic, fresh flowers make rooms of every shape, size and style that much lovelier
Full Story
DECORATING GUIDESWicker Style: Cottage to Cutting Edge
Find Wicker for Every Look, From Classic Porch Chair to Spaceship Daybed
Full Story
GREEN DECORATINGEcofriendly Fabrics Make the Cut
Natural, vintage and even — yes — synthetic fabrics can enhance your home's green factor and radiate style
Full Story0

FALL GARDENINGGreat Design Plant: Rock Cotoneaster
Adaptable and highly tolerant, this branching plant makes a terrific ground cover and cutting source
Full Story

dognapper2
nwgatreasures
Related Professionals
Redondo Beach Landscape Architects & Landscape Designers · Allentown Landscape Contractors · Tempe Landscape Contractors · East Haven Landscape Contractors · Fairhope Landscape Contractors · Fort Atkinson Landscape Contractors · La Vista Landscape Contractors · Shaker Heights Landscape Contractors · St. Louis Landscape Contractors · Vancouver Landscape Contractors · Weslaco Landscape Contractors · Whittier Landscape Contractors · York Landscape Contractors · Hawaiian Gardens Landscape Contractors · Casselberry Landscape Contractorslathyrus_odoratusOriginal Author
lathyrus_odoratusOriginal Author
lathyrus_odoratusOriginal Author
lathyrus_odoratusOriginal Author
lathyrus_odoratusOriginal Author
lathyrus_odoratusOriginal Author
lathyrus_odoratusOriginal Author
quinnfyre
lathyrus_odoratusOriginal Author
bspofford
inlovewithhoyas
lathyrus_odoratusOriginal Author
inlovewithhoyas
lathyrus_odoratusOriginal Author
inlovewithhoyas
quinnfyre
inlovewithhoyas