Shop Products
Houzz Logo Print
smgrim

Series of unfortunate events..... help!

smgrim
11 years ago

I have two African Violets given to me by my Grandfather after my Grandmother died two years ago. They are very precious to me as she was like a second mother. They were doing well but never bloomed and then the worst happened 6 mos ago...

I transplanted them to new pots (Now I know wrong season) and then used too harsh a brush on their leaves to clean them of cat fur. They were healing and returning to their perky selves when shortly after were knocked to the floor by the cats to lay out of soil for several hours. They were also slightly chewed.

It has been several months since then and they are barely holding on. I went to an indoor garden store where I was sold a light that was supposed to help with flowering - thing is I need them to just grow, I'm not concerned about flowering now and I think the light is burning them as I've read they do not like direct sun....

I need expert advice.

Their roots look in good shape. No rot, no pests. I believe I need a different soil and to re-pot but what soil? Can I order one online?

Additionally - I've recently acquired two pots specifically for African Violets. The top pot is removable and there is a fitted bowl you can add water to through a hole in the bottom piece. Water soaks in through the clay pot. I could replant them in that? I think it's too big for how small they've become.

I know not to water leaves and I have a light fertilizer that lists African Violets specifically. I only have north or south facing windowsills where Cats wont knock them....

I'm so desperate for your advice and fully prepared to learn and keep these plants long term to honor my Grandmothers love for them, even if these specific plants are not salvageable.

Thank you for your time!

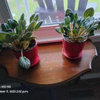
(Photo attached is of the best looking plant. The other is at half this size.)

Comments (27)

  • nyxx
    11 years ago
    last modified: 9 years ago

    I will leave the expert advice to the experts here. But I do want to assure you that contrary to what the general public believes african violets are really quite sturdy. I gave a lady in my knitting machine group one of my young ones. She assured me she couldn't grow it I assured her she could. After a couple months of owning it and knocking it over and out of the pot not once but three different times she came to last months meeting all excited cause not only was it alive and well it was blooming. So don't despair. If I were you once I got them growing well again I would root a couple leaves from them. Good luck =o)

  • stonesriver
    11 years ago
    last modified: 9 years ago

    Welcome to the forum. I hope we can help.

    Here are some suggestions:

    First, get a bag of perlite and mix it 2 or more parts to 1 of your soil. Take the perlite outside and rinse until all the dust is gone; let dry and mix with the soil.

    1. Take plants out of the pots they're in and put in pots 1/3 the diameter of the leaves. Small plastic cups (like the ones for the bathroom) work well. The pot this one is in is at least three times too big for the AV. Remember: Pots can never be too small for an African violet; only too big.

    2. Cut a hole in the bottom of the plastic cup.

    3. I don't know the correct term, but use one ply of a strand of yarn as a wick or a narrow strip of panty hose. Wet the wick.

    4. Run the wick through the hole in bottom of pot to about half-way up. Fill with soil 2/3 of the way up and plant your AV. Finish filling pot.

    5. You can make a reservoir out of a plastic tub with a hole cut in the lid for the wick.

    6. Water plant from top until it runs out of the bottom. Place on reservoir.

    7. Put them in the north-facing window to recouperate.

    I, personally, don't care for the kind of planter you acquired; however, there are lots of people here who use them most successfully to grow gorgeous plants.

    It doesn't matter when you transplant African violets. I do it whenever the mood and time strike be it July or January.

    Good luck,

    Linda

  • smgrim
    Original Author
    11 years ago
    last modified: 9 years ago

    Thank you for the encouragement Nyxx! I've seen replies here on other sick plants as blunt as "Not Salvageable" and am relieve to have positive response.

    Linda - Thank you! These violets will be setup this weekend and I'll post photos as they improve. Out of curiosity - What is the purpose of the 'wick'? Is that to assist in water drainage or does it assist in bringing water up to the top? Thank you again!

  • nyxx
    11 years ago
    last modified: 9 years ago

    The wick delivers the water to the plant without the fear of over watering. You don't want to use a natural fiber yarn such as cotton or silk as they degrade. Nylon or polyester work well for me. I found the youtube video I am including the link for quite informative.

    I, like Linda have not had a lot of luck with the two part ceramic pots. I always seem to get the ones that the inside pot has been fired to long and therefore is to hard for the water to penetrate. But others do seem to have great luck with them. I wish there was a way to tell by looking at the pot if it is fired correctly. Anyone happen to know?

    Good luck with your plants. Let us know how wicking works for you.

    Here is a link that might be useful: wick watering african violets

  • GCTBA
    11 years ago
    last modified: 9 years ago

    Just a word of caution re the wicking: Use 2 or 3 ply to start with. A thicker wick such as 6 or 8 ply or more will deliver far too much water for a small pot with a light mix.

    Good luck
    Andrew

  • stonesriver
    11 years ago
    last modified: 9 years ago

    Oops, one strand of 2 or three ply yarn. Is that correct? What I meant was to unravel the yarn and use one of those thingies. :-)

    Linda

  • GCTBA
    11 years ago
    last modified: 9 years ago

    I use 3 ply as I simply cant find 2 ply and I'm too lazy to unravel. Although I do have a Genuine Jewel on an 8 ply wick but its in a massive 6 inch pot.

    Tried the nylon stockings method but its too difficult for a mere male..

    Andrew

  • smgrim
    Original Author
    11 years ago
    last modified: 9 years ago

    Andrew, Linda, Nyxx - Thank you!

    The additional information on wicking will really help me succeed here. I'll post photos later today of the transplant and will keep you posted on the healing process.

    Anyone know how long I should expect to wait before I start seeing happier plants? I'm not sure how quickly these plants bounce back and a time frame will help me keep their progress in perspective.

  • smgrim
    Original Author
    11 years ago
    last modified: 9 years ago

    Just a photo of the newly potted violets sitting in my North facing window. You can see those darn cat furs but I'm going to wait to brush them until they are healthier.

    Thank you again for all the information and support! I'll post a photo of their progress once they perk back up.

  • Dan796
    11 years ago
    last modified: 9 years ago

    Wow! Good advice from everyone!

    To fill in the empty spaces,
    I also have a few helpful suggestions.
    Since you mentioned how you did damage to your AV's leaves using the wrong implament,
    I thought I could be of some help to you there.
    First, the best way to clean your AV leaves is to only use a thick artist's paint brush made of soft hair.

    OR even better,

    A thick blush brush used for applying makeup is perfect for cleaning AV leaves!
    It's thick, soft, and easy to handle!

    To clean a leaf, I (very carefully), with the leaf laying in my palm of my hand (palm up), While holding the leaf's stem very lightly between two fingers at the base of the leaf to be cleaned, I brush the leaf, starting from where the stem meets the leaf (between my fingers), and I lightly brush in one direction only, > To the tip of the leaf and lift the brush..
    This will keep the leaf hairs going in their correct, and naturally growing direction. look closely at a leaf and you'll see what I mean.
    So, make note, to always brush from the stem & leaf base to the tip of the leaf in one direction only, never the opposite way against the leaf's hairs! This will only break them, and cause the leaf to look like it's been sand papered.
    Holding the leaf in the palm of my hand gives it a soiid surface to lay on while brushing, and holding the stem between my fingers to steady it also so, I don't break a stem, or snap off a leaf. And cuping my hand as needed also helps me to control the leaf from moving too much from the pressure of the brush while cleaning.
    Short, quick, concentrated brush strokes for removing water spots, trapped pet hair, trash, fibers, etc. are also ok to use as long as all strokes are made moving toward the leaf's tip. Never the opposite way!
    I carefully brush each leaf until it doesn't look dull anymore but, has a healthy, warm, shiny glow!
    After brushing, the leaves will now get better light to it's surface, and brushing also unplugs the leaf's pores, which helps the plant breath better.
    As long as you are careful, brushing with a soft brush will not harm the leaf.
    I've also found that brushing clean a leaf before rooting will help it root much faster!
    With a little practice, you can "blush brush" clean an entire plant in just a few minutes.
    Especially, after the first time you've cleaned your AVs of most of their leave's dirty film. Try it! it works!
    You'll love how healthy they will look!
    (This is an old trick used by many old school AV show competitors)
    You can almost hear your AV's purring while they're being brushed! :)
    I wait until the smallest center crown leaves are big enough to hold in my hand, or at least I can balance on one finger before I will try to brush them if they need attention that badly But, in an emergency, I'll use a very thin, very soft haired art brush to very carefully fish out debree, as crown leaves are very, very fragile, and easy to break off, or damage by brushing.
    It's best to just not touch them at all.
    Brushing about once a month as maintanience is good for the plant's health.
    It also seems to stimulate plant growth.

    My second suggestion, is to put a little activated carbon in your wick's water container.
    This will keep the water in the reservior from getting stagnant, and nasty too quickly especially in warm weather, which can cause root rot.
    You can get activated carbon at any store that sells aquarium supplies. About a tablespoon full per quart of water in the reservior will work just fine.(or 2 tsps per pint, etc.)
    Activated Carbon is used in aquarium filters, and drinking water filters, so, it's not toxic. Replace with new carbon about once a month.

  • Dan796
    11 years ago
    last modified: 9 years ago

    Wow! Good advice from everyone!

    To fill in the empty spaces,
    I also have a few helpful suggestions.
    Since you mentioned how you did damage to your AV's leaves using the wrong implament,
    I thought I could be of some help to you there.
    First, the best way to clean your AV leaves is to only use a thick artist's paint brush made of soft hair.

    OR even better,

    A thick blush brush used for applying makeup is perfect for cleaning AV leaves!
    It's thick, soft, and easy to handle!

    To clean a leaf, I (very carefully), with the leaf laying in my palm of my hand (palm up), While holding the leaf's stem very lightly between two fingers at the base of the leaf to be cleaned, I brush the leaf, starting from where the stem meets the leaf (between my fingers), and I lightly brush in one direction only, to the tip of the leaf.
    This will keep the leaf hairs going in their correct, and naturally growing direction.
    So, make note, to always brush from the stem & leaf base to the tip of the leaf in one direction only, never the opposite way against the leaf's hairs! This will only break them, and cause the leave to look like it's been sand papered.
    Holding the leaf in the palm of my hand gives it a soiid surface to lay on while brushing, so I don't break a stem, or snap off a leaf. And cuping my hand as needed also helps me to control the leaf from moving too much from the pressure of the brush while cleaning.
    Short brush strokes for removing water spots are also ok as long as all strokes are made moving toward the leaf's tip.
    I carefully brush each leaf until it doesn't look dull anymore but, has a healthy, warm, shiny glow!
    After brushing, the leaves will now get better light to it's surface, and helps the plant breath better.
    As long as you are careful, brushing with a soft brush will not harm the leaf. I've also found that brushing clean a leaf before rooting will help it root faster!
    With a little practice, you can "blush brush" clean an entire plant in a few minutes. Especially, after the first time you've cleaned your AVs of most of their leave's dirty film.
    (This is an old trick used by many old school AV show competitors)
    You can almost hear your AV's purring while they're being brushed! :)
    I wait until the smallest center crown leaves are big enough to hold in my hand, or at least I can balance on one finger before I will try to brush them if they need attention that badly But, in an emergency, I'll use a very thin, very soft haired art brush to very carefully fish out debree, as crown leaves are very, very easy to break off, or damage by brushing.
    It's best to just not to touch them at all.
    Brushing about once a month as maintanience is good for the plant's health. It also seems to stimulate plant growth.

    My second suggestion, is to put a little activated carbon in your wick's water container.
    This will keep the water in the reservior from getting stagnant, and nasty too quickly especially in warm weather, which can cause root rot.
    You can get activated carbon at any store that sells aquarium supplies. About a tablespoon full per quart of water in the reservior will work just fine.(or 2 tsps per pint, etc.)
    Activated Carbon is used in aquarium filters, and drinking water filters, so, it's not toxic. Replace with new carbon about once a month.

  • aharriedmom
    11 years ago
    last modified: 9 years ago

    I had an unfortunate event happen two mornings ago. We'd had a "daycation" and got home late Sunday night. I had to get up early on Monday morning and when I got out of bed, very groggy, I stepped on a wire basket that I'd pulled off the shelf and neglected to put back. Trying to avoid "whatever it was" (I wasn't sure what it was when I stepped on it), I lost my balance and fell against an antique table that was my great-grandmothers.... when I tried to avoid falling on the table, I fell backwards into the shelf and damaged the leaves on two of my AVs and knocked one of those two off the shelf, upside down. :(

    The only bright side is that one had been recently repotted so didn't have flowers and the one that got knocked on its head was due for a repot - so I just removed the damaged flower stalks and leaves and repotted it. Poor babies, but at least they seem to have forgiven me with no lasting ill-effects.

    Now I know if I'm that tired, I should just stay in bed.

  • nyxx
    11 years ago
    last modified: 9 years ago

    Ack! What a way to start the day. Hope you are ok.

  • aharriedmom
    11 years ago
    last modified: 9 years ago

    I'm okay, I do have a bruise/scrape on the back of my thigh where the edge of the shelf got me but nothing more than an inconvenience.

    Ha, I usually have pretty good balance and reflexes after years of avoiding suddenly appearing kitties and stepping on Legos and lifting my foot up before I put all my weight down. ;)

  • nyxx
    11 years ago
    last modified: 9 years ago

    LOL I hear that, but in my case it was puppies and Legos. But glad to hear you didn't injure yourself to much.

  • smgrim
    Original Author
    11 years ago
    last modified: 9 years ago

    Hi everyone,

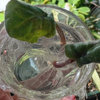
    It has been some time and I meant to post sooner. One of the violets made a FULL recovery and is looking great. See attached photo. The other did not make it. When I added it to compost over the weekend, the root was hollow. It was long gone.

    I am VERY happy to have this one so strong and really hope to have it blossom this year as they never have in the 3 years I've had them.

    I've also moved and now have a proper window for the survivor plant.

    THANK YOU TREMENDOUSLY FOR ALL YOUR GREAT ADVICE AND SUPPORT!!! I would have lost them both without your help. THANK YOU!!!!!

    I'm a sponge. If you have any more tips for me I'll soak them up!

    Thanks again! :)

  • irina_co
    11 years ago
    last modified: 9 years ago

    Great Job!

    Now you need to get another one - so it will have company.

    I.

  • lilypad22
    11 years ago
    last modified: 9 years ago

    How wonderful. So glad for you. I love to see updates, so thanks for posting. Happy endings are nice.

  • smgrim
    Original Author
    10 years ago
    last modified: 9 years ago

    Another update - I've had this violet since 2010 and this is its first-ever bloom under my care!! It was my grandmothers, who was like a mother to me. I have many memories of her tending to it. Today, it is thriving and I know Grandma is up there, thrilled.

    To all of you - here is a GREAT BIG T.H.A.N.K. Y.O.U!!!!

  • smgrim
    Original Author
    10 years ago
    last modified: 9 years ago

    Another photo

  • michael1846
    10 years ago
    last modified: 9 years ago

    You can start some leaf cuttings now that it's so healthy and make more of the same plant if I like a violet I make like 10 leaf cuttings and keep one and geve them all to friends and family so if mine dies I will allways have access to more leaves :)

  • smgrim
    Original Author
    10 years ago
    last modified: 9 years ago

    How do you start least clippings?

  • smgrim
    Original Author
    10 years ago
    last modified: 9 years ago

    How do you start least clippings?

  • PRO
    Whitelacey
    10 years ago
    last modified: 9 years ago

    To start a leaf cut it from your plant leaving about an inch of the petiole (leaf stem). Take the leaf from the middle row of the violet. The outer row is beginning to age, and while they can produce babies, they lack the vigor of the younger middle row and may take longer to produce babies. The new leaves are immature.
    Make the cut at an angle with the long section of the angle at the back of the leaf and the short in the front. Leaves will produce without this angle cut, it just helps the babies to come up at the front of the leaf rather than the back where they will be in the mother leaf's shadow.
    Plant the leaf in a light mix-some use the 1/3 peat, 1/3 vermiculite, 1/3 perlite mix. Some use just perlite. I've used both successfully.
    Put the leaf in a baggie or a dome. You are, in effect, making a mini greenhouse. Put in good light, not sun, and then-practice patience! Keep an eye on your leaf and water as needed. You probably won't need to water much because the baggie helps prevent water evaporation and retains humidity. Leaves will vary in the time they take to produce babies. The shortest I've had was 10 days. The longest about 6 months. As long as the leaf is healthy, it can produce babies.
    Most growers take a leaf from any new violet they get just in case something happens to the original.
    Give it a try-it's actually quite easy! Glad to see you were successful with your Grandmother's violet.

    Linda

  • aegis1000
    10 years ago
    last modified: 9 years ago

    SO glad that your Grandmother's violet is healthy and blooming.

    You know ... an alternative to starting leaves from your Grandmother's plant (although I might try a couple), ... is to get a few COMPLETELY NEW AND DIFFERENT plants.

    The available color range is red, pink, white, violet, etc. and flower types are varied ...

    There are many available plants out there. I would go with mail-order from a trusted grower (Lyndon Lyon) to avoid problems with disease/pests that could actually threaten your current plant.

    Plants from local vendors (grocers, box-stores, even plant-shops), often have hidden problems which can make growing violets just that much harder.

    Take a look at Lyndon Lyon (if you dare ...). Happy growing to you ...

  • PRO
    Whitelacey
    10 years ago
    last modified: 9 years ago

    Another thought-in re-reading your original post, I saw where you mentioned not to get the leaves wet. I wish this false idea would go away---quickly!!! You can get the leaves wet and many growers and showers routinely wash their violets. I think it is much easier, quicker and works better than the brush method.
    As a landscaper, when I teach my clients how to care for their plants, I tell them to try to emulate the plant's natural environment as much as possible. And African violets get wet leaves from rain in their native environment. What they don't get is COLD water.
    Dust and debris block the stoma (little pores) on the leaf's surface which they need to perform the gas exchange (breathing) that is vital to their survival.
    So go ahead and wash your violet using warmish water. You will almost be able to hear their sigh of relief!
    Here's a good video.

    Linda

    Here is a link that might be useful: Washing African Violets

  • michael1846
    10 years ago
    last modified: 9 years ago

    I use a soft. Bristled toothbrush to wash off my violets you even might give a leaf to somewon on here I start mine in water I just cut a leaf I use outer leaves just make shouts that they are not yellowing or Browning then I put room temp water in the cup saran rap (for saving food) the lid then poke a hole in the rap and put the leaf in I would advise changing the water every 3 days it will seem like nothing will happen for a bit then boom roots come out out like nobody's business I personally wait for little leaflets to come out but I gess you could pot at the first sight of roots that look sturdy enough to pot good luck

Sponsored
CHC & Family Developments
Average rating: 5 out of 5 stars4 Reviews
Industry Leading General Contractors in Franklin County, Ohio