


More Semps & Sedums (Pics)
Janet_SW_BC
21 years ago
Sort by:Oldest
Comments (27)
Related Stories
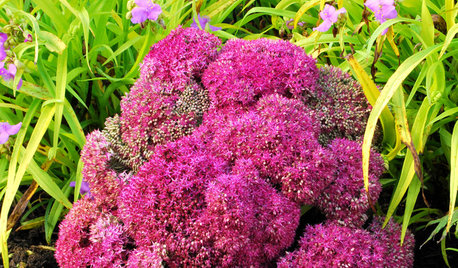
GARDENING GUIDESGreat Design Plant: Sedum (Stonecrop)
Terrific at filling gaps and in a wide range of colors and shapes, sedum is a problem solver in the garden
Full Story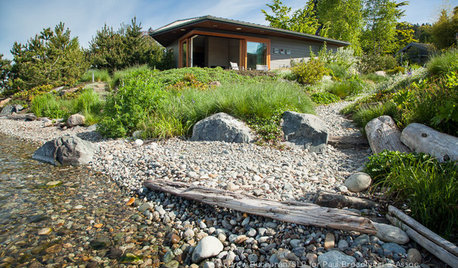
INSPIRING GARDENSLawn Gives Way to a More Natural Lakeside Garden
Meadow grasses, beach pebbles and driftwood replace turfgrass in a nature-friendly landscape on Lake Washington’s shore
Full Story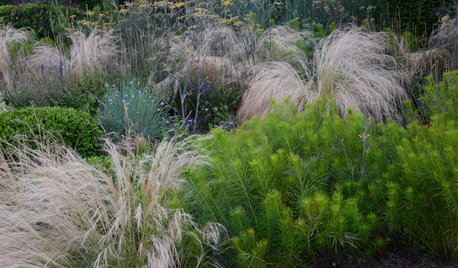
GARDENING GUIDES4 Ways to Break the Rules in Your Garden
For a more creative landscape design, take a different approach to planting
Full Story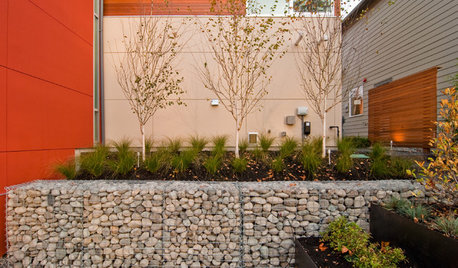
LANDSCAPE DESIGNGarden Walls: Gabion Evolves From Functional to Fabulous
The permeable rock-, concrete- or glass-filled steel cages are showing up as retaining walls, planters, benches and more
Full Story
GARDENING AND LANDSCAPING13 Quick-Change Boosts for a Spring Patio
Enjoy your outdoor room more with these enhancements that are easy, impactful and kind to your budget
Full Story
CONTEMPORARY HOMESHouzz Tour: Flexibility and Efficiency for a New Seattle Home
With rental potential and an ecofriendly design, this house is smart in more ways than one
Full Story
GARDENING GUIDESYour November Garden Checklist
What to do around the U.S. this month to help your garden thrive — when you're not admiring fall's brilliant colors, that is
Full Story
GARDENING GUIDES6 Steps to Get a Garden Off to a Glowing Start
Grow a lush, balanced garden from an empty patch of yard or neglected landscape spot with these easy-to-follow guidelines
Full Story
GREAT HOME PROJECTSHow to Replace Your Lawn With a Garden
New project for a new year: Lose the turfgrass for energy savings, wildlife friendliness and lower maintenance
Full Story
LANDSCAPE DESIGNDare to Mix Things Up in the Landscape
Courageously contrast plantings, materials and structures in your garden to create unexpected beauty and intrigue
Full StorySponsored
Wendy_the_Pooh
Janet_SW_BCOriginal Author
lisazone6_ma
safariofthemind
Janet_SW_BCOriginal Author
hannamyluv
Janet_SW_BCOriginal Author
Ina Plassa_travis
Gardentoadz
MeMyselfAndI
mmmjaycee
triple_creek
shadeeladee
Janet_SW_BCOriginal Author
threedogsmom
Janet_SW_BCOriginal Author
threedogsmom
Janet_SW_BCOriginal Author
gardening_fever
Janet_SW_BCOriginal Author
Astilbe_J
mareas
Janet_SW_BCOriginal Author
vbain
bcreighton7
kim31kim
chloeasha