


An interesting observation regarding cuttings
steve22802
11 years ago
Related Stories

HOME OFFICESQuiet, Please! How to Cut Noise Pollution at Home
Leaf blowers, trucks or noisy neighbors driving you berserk? These sound-reduction strategies can help you hush things up
Full Story
ACCESSORIESEasy Green: Cut Electricity Use With 15 Unplugged Home Devices
Crank up the energy savings, courtesy of household items that come into power the old-fashioned way: manually
Full Story
LIFEYou Said It: ‘We Call It Character’
Design advice, inspiration and observations that struck a chord this week on Houzz
Full Story
LIFEYou Said It: ‘The Birds Will Thank You’ and More Houzz Quotables
Design advice, inspiration and observations that struck a chord this week
Full Story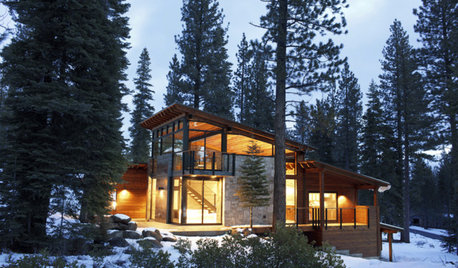
HOUZZ TOURSHouzz Tour: Cozy Mountain Retreat Near Lake Tahoe
An observation deck, a gourmet kitchen and generous helpings of windows make this California vacation home a storm watcher's paradise
Full Story
You Said It: ‘The More Dents, the Better’ and More Houzz Quotables
Design advice, inspiration and observations that struck a chord this week
Full Story
GARDENING GUIDES8 Native Shrubs for Year-Round Bird Feeding
It’s not just about berries. These plants provide insects for birds and seasonal interest for gardeners
Full Story
LIFEYou Said It: ‘It’s Important to Wait’ and More Houzz Quotables
Design advice, inspiration and observations that struck a chord this week
Full Story
LIFEYou Said It: 'The Truth Is in the Details' and More Quotables
Design advice, observations and inspiration that struck a chord this week
Full Story
LIFEYou Said It: ‘What Do You Want Your Deck to Do?’ and More Quotables
Design advice, inspiration and observations that struck a chord this week
Full StorySponsored
Your Custom Bath Designers & Remodelers in Columbus I 10X Best Houzz
teddahlia
steve22802Original Author
Related Professionals
Carson Landscape Architects & Landscape Designers · Waunakee Landscape Architects & Landscape Designers · Brookfield Landscape Contractors · Fort Wayne Landscape Contractors · Hoover Landscape Contractors · Hurricane Landscape Contractors · Medford Landscape Contractors · Milford Mill Landscape Contractors · Norwalk Landscape Contractors · Cicero Fence Contractors · Fort Lee Fence Contractors · Manorville Fence Contractors · Sun City Fence Contractors · Torrance Fence Contractors · Muscoy Solar Energy Systemsteddahlia
steve22802Original Author
steve22802Original Author
teddahlia
steve22802Original Author
graceSF
steve22802Original Author
CCvacation
teddahlia
CCvacation
CCvacation
teddahlia
graceSF
CCvacation
teddahlia
CCvacation
teddahlia
steve22802Original Author
teddahlia
steve22802Original Author