Shop Products
Houzz Logo Print
julsie_grl

Pressure canning -- did I do it right?

julsie
17 years ago

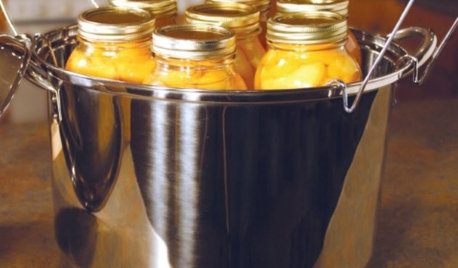
Today I used my new pressure canner (12-qt Mirro) for the first time to can some broth made from the remains of Thanksgiving's turkey. I didn't have a recipe for turkey stock, but according to BBB's recipes for beef and chicken stock, I should be fine. But I'm wondering if I'm using my new canner right.

When I put the pint jars in the canner, the maximum fill line is below the tops of the jars. So the water isn't supposed to cover the jars like it would in a boiling-water canner?

Also, the thing seemed to be spitting a lot of steam and hissing the entire time it was boiling. Is that normal? I've only been around a pressure cooker once, and it just didn't seem nearly as noisy (and didn't sound like it was going to explode at any moment!)

The jars appear to be sealed, but they're still cooling, so I haven't tested them yet.

Comments (17)

  • readinglady
    17 years ago

    No, it's not like a boiling water bath. The fill line in a pressure canner is well below the tops of the jars. You're putting in enough water to generate steam under pressure and a safety margin so the canner doesn't boil dry during the processing time.

    Canners can be noisy, though it's possible you had the heat higher than it needed to be. You want a gentle jiggle, so if the weight is very active, back off on the heat just a bit. Don't drop the temperature radically. Make any changes gradually.

    I'm assuming you vented the canner a full ten minutes before applying the weight.

    Carol

  • julsie
    Original Author
    17 years ago

    Actually, no. I didn't know I was supposed to vent the canner that long. The directions for the canner didn't mention that. Is that why it was so noisy?

    Julie

  • readinglady
    17 years ago

    How long did you vent the canner for, Julie? Let me back up and run through what you need to do; it's possible what you processed needs to be re-done for safety.

    I have a 12-quart Mirro; I haven't used it myself. It was just given to me by a friend who moved, but I can check the instruction book and run through it with you.

    (Boy, you're right. Their instructions are confusing.)

    1. Be sure you're referring to the Canning section and not the Cooking section. Unless your manual is different, go to the back page 25. The first set of instructions "General Tips" is for TESTING, not canning. So move beyond those.

    Then they give instructions for dealing with the jars, so it isn't until step 10 page 25 that you get to the CANNER.

    So once your jars are prepped and you've filled them or you've started filling them, get the canner ready.

    1. Fill the canner with 2 quarts of water. I start heating it at that point so the water stays hot and the total time is minimized.

    2. Be sure the rack is on the bottom.

    3. Place the filled jars in. I do them as I go.

    4. Then place on the cover and close the canner.

    5. Now, notice STEP 13 - Don't put the weight on. Just let the canner vent for 10 minutes. To do that, let the water inside boil. In a short while you'll see bubbles spitting through the vent. Just wait. When you see a clear plume of steam coming out of the vent set your timer and wait 10 minutes. This step is crucial; otherwise the canner doesn't build to the right pressure and temperature.

    6. After a full 10 minutes, put the weight on at 10 pounds pressure. Wait for the control to start jiggling or rocking vigorously. Then you can gradually turn the heat down to maintain a steady rocking.

    7. You count the processing time from the moment the weight has started jiggling vigorously. So there's a lag time from the time you put the lid on and the countdown for processing begins.

    I hope this is clear, Julie. I'll check in again later to see if you have other questions.

    On the face of it, though, it sounds like you'll need to re-process your broth, unless it's a really small batch and you just decide to refrigerate the jars short-term or freeze.

    To reprocess you'd need to use new lids, get clean, hot jars and the rings. You open the jars, dump the broth back into the pot and return it to the boil. So basically it's back to the beginning but you can't just put the original sealed jars back in the canner. The jars have to be hot, the stock has to be hot and there have to be fresh lids.

    Pressure-canners are a wonderful tool, but there is a learning curve. Don't get discouraged. After a couple of times it'll become automatic. Believe me, there isn't a one of us who hasn't had to go through this.

    Carol

  • readinglady
    17 years ago

    Sorry, I should have typed "Julsie" rather than Julie.

    Carol

  • julsie
    Original Author
    17 years ago

    My manual is different. There's no mention anywhere of letting the canner vent before putting on the weight. The weight actually has to be screwed on, which makes me think it would be hard to do without getting steam burns if you wait until the canner is steaming that steadily.

    So, it's just a given for pressure canners that they need to vent ten minutes? I'm going to ask a physics teacher about this, because it doesn't make sense to me. But I'll pop my jars in the fridge until I have a chance to reprocess in a couple days.

    Thanks a bunch, Carol!

    Julie/Julsie, it doesn't matter which.

  • readinglady
    17 years ago

    If your model is a pressure CANNER as opposed to a pressure COOKER, you should either have a weight that looks like a round disk with 5-pound, 10-pound and 15-pound holes or an older style 3-part black plastic and metal weight that disassembles. It's all 3 pieces for 15 pounds, 1 piece removed for 10 pounds, 2 pieces removed for 5 pounds. You remove whatever you need to before you ever put it over the vent.

    Either weight just drops on; I don't know of any pressure control on the market that screws on and I have 3 pressure canners  a Presto, an All-American and a Mirro. The vent tube screws in, but it should already be inserted and it's nothing you need to fiddle with; the steam comes out of that tube; then when it's time you drop the pressure control down over. Wearing gloves is a good idea.

    You MUST vent the canner for 10 minutes. There are NO exceptions. All the safe canning times have been calculated based on that assumption.

    If you look at the drawing I linked to, your Mirro should look like the canner in the front and it should have either a take-apart 3-piece weight like the one on the canner or a disk with 3 holes like the alternative that's shown on the upper left.

    Do ask the physics teacher. It's always a good idea to get a second opinion. You definitely want to be totally clear about what you're doing. Since the stock is sealed and refrigerated, there's no problem with giving yourself some time.

    Carol

    Here is a link that might be useful: Pressure Canner Diagram

  • annie1992
    17 years ago

    I agree, the canner must be vented for 10 minutes, it's "figured into" the time required for safe canning.

    I've used my old pressure canner for so long that I can't even find the instructions, but all my canning manuals, the Ball Blue Book, the USDA guide, MSU, they all require venting the canner for 10 minutes.

    I'd reheat that broth and reprocess it. Carol has given some very detailed instructions, so I won't rehash that, but I'd definitely do it over.

    Annie

  • morz8 - Washington Coast
    17 years ago

    Neither my vintage 22 qt Mirro nor my newer smaller model mention venting in the manuals that came with the canners - I have both manuals and the instructions for the 22 qt specifically say to assemble the canner with weight in place and turn on high heat.

    I do vent as an added precaution but only after reading about it here - for years I did not.

    Julsie, not being able to hear your canner, just a thought - If my weighted gauge canners are not sitting perfectly level they will do a lot of hissing and spitting for the amount of weight jiggling going on. I keep a small level in my canning supplies and slide a penny under the burner ring if necessary. (It was more of a problem with the 22qt than my 12 qt - buying a heavy duty canning element helped enormously.)

  • readinglady
    17 years ago

    My Mirro canner manual does mention venting, but it's in an obscure location.

    Older models, like my 35-year-old Presto, often mention venting for a shorter period, 5-7 minutes, but 10 minutes has been the standard for many years.

    The original tests were done in the 1940's, I believe. It was determined that safe venting (exhaust) times did vary depending upon the size of the canner and the thickness of the wall/heat properties among other things. But because it was too complicated to keep track of every model and size, 10 minutes was selected as a consistently safe time regardless of the canner that's being used.

    I'm really having trouble understanding why this is an issue. Even my old 1948 Kerr Canning book says, "Leave the petcock open to exhaust the cooker. When steam is flowing from the petcock in a steady stream, start counting exhausting time. Allow steam to escape freely for 7 to 10 minutes. Then close petcock and as soon as the required amount of pressure is reached on the pressure gauge, start counting processing time." etc.

    That's 59 years ago, for heaven's sake. It's not rocket science.

    Here is the archived copy of the Mirro Pressure Canner manual. If you refer to page 24 of the PDF document, item 13, you will see it says to vent your Mirro canner 10 minutes. Mirro Pressure Cooker Manual.

    If you'd like another source for the issue of venting you can refer to page 1-8 in the USDA Guide "Principles of Home Canning" for information on this topic. I've provided a link below.

    That's it for me. I am finished with this issue.

    Carol

    Here is a link that might be useful: USDA Guide: Principles of Home Canning

  • julsie
    Original Author
    17 years ago

    Thanks, everyone. I'm just frustrated because I looked at all the directions I had available in my kitchen and it wasn't clear. Still, it doesn't make sense that the venting is required for the cooker to reach pressure -- the physics don't work that way. But I realize that there are other reasons to vent, and I'll reprocess the broth.

    I swear, the weight, which is 3-part, has to be screwed on and off. Maybe I got the psycho alien pressure canner.

    Thanks a bunch!
    Julie

  • melva02
    17 years ago

    Julie, you're right--even though getting rid of the air is required, it's not because the pot won't otherwise come up to pressure. It's to give the water a chance to boil up enough steam to displace all the air and force it out the petcock. The idea is to have the space around the jars filled ONLY with water in a saturated liquid/vapor mixture--NO air left inside.

    If you have a saturated mixture (liquid/vapor) of a single species (water) at a certain pressure, you can be sure that it is at the saturation temperature (baddie-killing temperature). If there is air mixed in, you cannot be 100% sure of the temperature, since all the air is vapor (i.e., no liquid air, of course not), and at a given pressure, the temperature of the air will vary based on the volume of the air inside (which you don't know). Temp and pressure are not locked together for an ideal gas such as air. To be precise about the temperature, you would need to use partial pressures (calculate how much the air & the steam/water each contribute to the total pressure inside the vessel).

    Practically speaking, the air might not make a difference in the saturation temp of the water-air mixture at a given pressure, so you might argue venting doesn't matter. BUT those 10 minutes are included in the processing time when they test recipes, so in any case they are required to heat the jars to the correct temperature for a safe product.

    Melissa (thermodynamics nerd)

  • julsie
    Original Author
    17 years ago

    Thank you, Melissa! I was really tempted to just put the weight on at the beginning and add ten minutes to the processing time. It all makes sense now! :-)

    I reprocessed, and one jar didn't seal. I wish those things weren't so temperamental. ;-( I keep reminding myself how much I'm going to love this turkey broth in a few months.

    Julie

  • melva02
    17 years ago

    Glad to help. I would freeze the extra jar in ice cube trays to add to sauces and vegetables. Then you have jars for when you need a lot, and smaller amounts for when you don't want to open a jar. Plus you feel like you wanted to freeze some, instead of feeling like the bad seal forced it on you. :-)

    Melissa

  • Linda_Lou
    17 years ago

    The manual says fill with 2 quarts of water ? There should be 2-3 inches of water put in the bottom. I can't see how 2 quarts of water would be that deep.
    From National Center for Home Food Preservation :
    Center the canner over the burner. When you have your jars of food ready for canning, put the rack and hot water into the canner. If the amount of water is not specified with a given food, use 2 to 3 inches of water. Longer processes required more water. Some specific products (for example, smoked fish) require that you start with even more water in the canner. Always follow the directions with USDA processes for specific foods if they require more water be added to the canner.

    This is from National Center for Home Food Preservation on venting the canner :
    Air is trapped in the closed canner during the process. Air trapped in a pressure canner lowers the temperature obtained for a given pressure (for example, 10 or 15 pounds pressure) and results in underprocessing. To be safe, USDA recommends that all pressure canners must be vented 10 minutes before they are pressurized.

    Here is a link that might be useful: National Center for Home Food Preservation.

  • ernie_tn
    17 years ago

    Julie

    You are right that the weight screws on. However, after you screw it on if you lift it up you will see that it moves about a half inch before it starts to unscrew. At that time if you unscrew it about a quater turn the weight will stay there and the canner will vent just fine. After the canner has vented (it will vent out to the sides) you can safely turn it back down the quarter turn and it will drop down and begin to build up pressure. You can also reach in with a long handled knife,spoon,or wheatever and turn it that quarter turn.

    Ernie

  • gran2
    17 years ago

    Carol gave a really good procedure,and thanks, Melissa, forthe mini-chemlesson. I shunned chem and the sciences in school and now am finding a real lack. I canned for years without venting and my extension educator about went into shock. There is such a thing as Grace, thank you very much. All of us can tell tales of doing things wrong and living to tell about it, but I'm certainly not going to do it anymore!

    I've worked with five pressure canners , all different sizes, and all called for a standard 2 quarts of water. When all is said and done, it comes up just about the same on the jars. I've even had canners go dry, so I sure wouldn't skimp, and too much just takes longer because it all spits out. Julsie, when you're preparing your jars, wipe the rims and use a clean, wet finger to run around the top of the jars (sealing surface) until they "sing". You'll find all kinds of hairline cracks or specks of food or salt that would otherwise be missed, also residue from other canning lids that needs to be scraped. Perhaps this might improve your don't-seal ratio. Keep at it. You're right. You will really love having this broth later on.

  • julsie
    Original Author
    17 years ago

    Ernie, thanks for the tip! I never would have thought of leaving the weight partially unscrewed.

    My manual is completely different from the one Carol linked to, and I don't think it said anything about 2 quarts. I just filled up to the maximum fill line, which is probably why my canner made so much noise and spit so much steam! I'm sure I can safely say that there was no residual air trapped in my canner.