


Making a drainage hole in ceramic pot
thyme_waits_for_me
16 years ago
Featured Answer
Comments (13)

barrie2m_(6a, central PA)
16 years agothyme_waits_for_me
16 years agoRelated Professionals
Lake Oswego Landscape Architects & Landscape Designers · Newcastle Landscape Architects & Landscape Designers · Cedar Hill Landscape Contractors · Hickory Hills Landscape Contractors · New Providence Landscape Contractors · North Highlands Landscape Contractors · Snoqualmie Landscape Contractors · South Farmingdale Landscape Contractors · Vancouver Landscape Contractors · Golden Valley Landscape Contractors · Merrifield Landscape Contractors · Georgetown Roofing & Gutters · Houston Roofing & Gutters · Columbus Roofing & Gutters · Westchester Roofing & GuttersHeathen1
16 years agoksrogers
16 years ago
CA Kate z9
16 years agorhizo_1 (North AL) zone 7
16 years agoflora_uk
16 years agothyme_waits_for_me
16 years agorhizo_1 (North AL) zone 7
16 years agomarybice66_yahoo_com
12 years agoLoyda
11 years ago
Michael AKA Leekle2ManE
11 years ago

Related Stories
TILEPorcelain vs. Ceramic Tile: A Five-Scenario Showdown
Explore where and why one of these popular tile choices makes more sense than the other
Full Story
TRADITIONAL STYLEDecorating With Antiques: The Magic of Ceramics
Bring charm and beauty to a room with collected ceramics — used as intended or entirely reinvented
Full Story
KITCHEN DESIGNKitchen Sinks: Easy-Clean, Surprisingly Affordable Ceramic
You get a lot for the price with ceramic sinks, and they're available everywhere. See the pros and cons here
Full Story
HOUSEPLANTSOne Pot, One Big Shot of the Tropics
Give your rooms exotic flair in a single stroke. Tall Kentia palm fits the tropical bill beautifully
Full Story
CONTAINER GARDENSSolve Your Garden Border Dilemmas With Planted Pots
Set your containers free from the patio — placed among plantings in the ground, they fill unsightly gaps, let you experiment and more
Full Story
GREAT HOME PROJECTSMake Your Own Tranquil Garden Fountain
With this DIY water feature in your yard, serenity is just a few steps away
Full Story
CONTAINER GARDENSDIY Project: Teacup Planter Pots
Add a riot of color to a windowsill, table or balcony by repurposing old cups and saucers as little planter pots
Full Story
CONTAINER GARDENSContainer Garden Basics: How and When to Water Potted Plants
Confused about soil moisture, the best time to water and what watering device to use? This guide can help
Full Story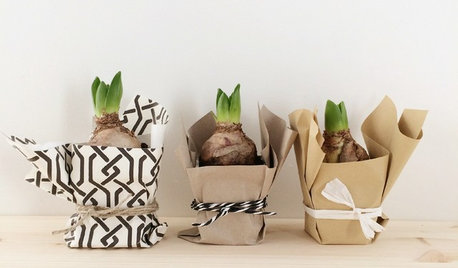
DIY PROJECTSDIY: Make a Sweet Gift of Future Blooms
Wrap flowering bulbs in decorative paper and string for a cheery addition to table decor or a pretty holiday present
Full Story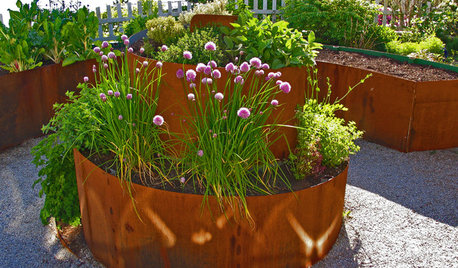
URBAN GARDENSContainers Make Growing Edibles a Cinch
If life hands you a lack of land, grow lemons — with a few basics, you can proudly reap the fruits, veggies and herbs of your labor
Full StorySponsored
Columbus Area's Luxury Design Build Firm | 17x Best of Houzz Winner!
More Discussions
tapla (mid-Michigan, USDA z5b-6a)