


Resetting Elegans
My plan for this spring was to combine all three of my Elegans into one massive planting. I had done some research and thrown a few emails out, but ultimately came to the conclusion that the area I had planned was going to be too small in the long run.
I would love to not have three separate plantings, but these are the matrons of the garden. I have developed an affinity that could never allow me to part with any just for the sake of space. So I am back to the drawing board to figure out how I can feature the other two, but the original clump is in the perfect spot and I had no intentions of moving her.
Which brings me to my post. I had today off and knew that I wanted to get outside and do SOMETHING, so I figured I'd reset the original clump and clean her up a bit.
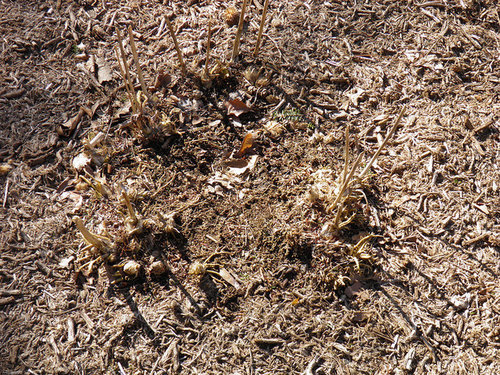
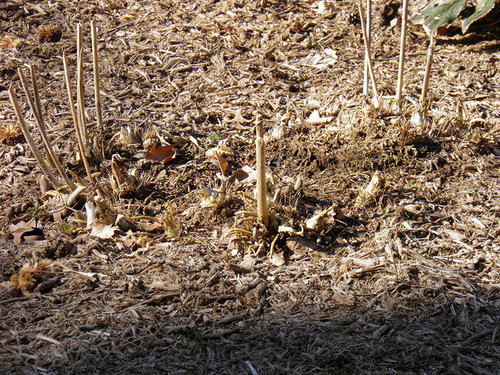
It's not severe, but the pictures below show her age. She has a bit of fairy ring going on, and slight heaving.
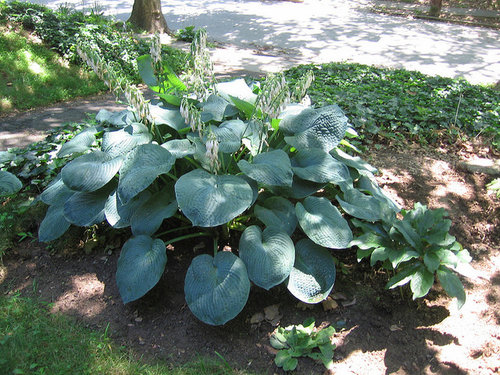
Here she is last year in June. ::sigh::
Since I know this will be the permanent spot for this clump, I figured I'd clean her up a bit and get rid of that fairy ring. Give her a fresh start after so many years of neglect. Digging it up also allows me to turn back the clock a few years and reduce the overall size while the other new additions have a chance to establish around her.
So away I went :)
First I pushed all of last year's mulch away.

Then I slowly began to dig a hole around the crown giving me enough roots to work with. You can see the bottom right portion cracked since there is nothing left in the middle to hold it together.
Annnnd then my shovel broke . . . d**m it !!!

DON'T PANIC . . . I had another shovel :p
So I severed another chunk off the bottom left to give me three pieces total. Even in three pieces, they were dreadfully heavy. I knocked as much soil off as I could without taking too many roots. Then I ran them all under the hose.
You wouldn't believe the crap I found tangled in those roots. Nails, broken glass !!!, old pieces of ceramic pipe, and plenty of rocks. Poor thing :(

This was the biggest clump and pretty much half of the plant. It's about 2 feet wide.

The other two pieces were smaller, but still respectable. Any one of these divisions would have made a decent sized plant on its own.
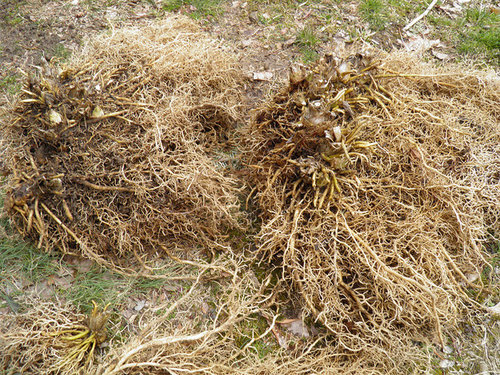
Give you a sense of proportion.

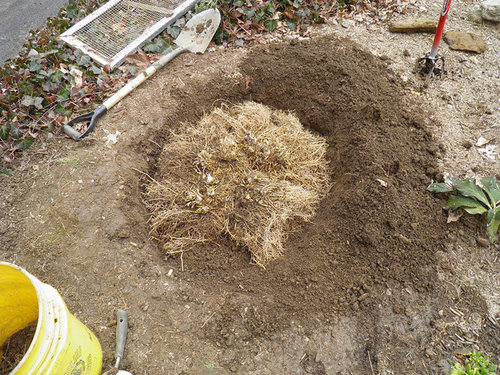
After all the divisions were washed I threw a bag of composted cow manure and another bag of mushroom manure in the hole and stirred it all up. See, other shovel.

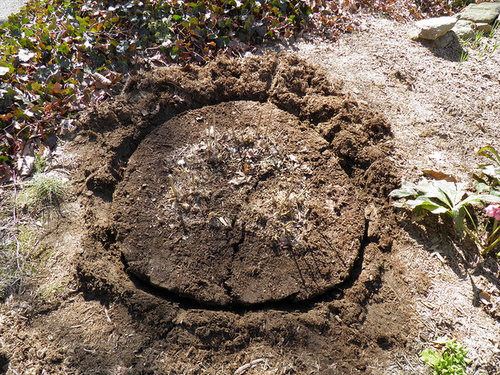
After I was done mixing in the amendments I cleared out the hole for planting.

And then VOILA !!! She is like new. No more fairy ring, no more garbage in her roots, and nice amended-sifted soil beneath her. What more could a hosta ask for. :)
These are her neighbors. You can see the hole behind them filled in and evened out.

Some might say that all this was unnecessary and I should leave a happy hosta alone. But I enjoyed the time outside and it was nice to stretch my winter muscles. I feel better now about the overall health that the plant will have in the years to come.
Thanks for reading :)
Ludi


don_in_colorado
hostanista
Related Professionals
New Bedford Landscape Architects & Landscape Designers · Addison Landscape Contractors · Chelmsford Landscape Contractors · Darien Landscape Contractors · Lemoore Landscape Contractors · Mashpee Landscape Contractors · Ponte Vedra Beach Landscape Contractors · Santa Ana Landscape Contractors · Tustin Landscape Contractors · Maplewood Landscape Contractors · Beaverton Fence Contractors · Cayce Fence Contractors · Nipomo Fence Contractors · Half Moon Bay Solar Energy Systems · Maple Grove Solar Energy SystemsBabka NorCal 9b
Steve Massachusetts
don_in_colorado
User
ken_adrian Adrian MI cold Z5
Jon 6a SE MA
hostafreak
Ludicious AcresOriginal Author
User
don_in_colorado
gogirlterri
stoc zone 6 sweden
Ludicious AcresOriginal Author
in ny zone5
don_in_colorado
Ludicious AcresOriginal Author
Ludicious AcresOriginal Author