Shop Products
Houzz Logo Print
sgmd

Autopot

sgmd
20 years ago

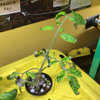
Has anyone tried the autopot? (see http://www.futuregarden.com/hydroponics/systems_smartgarden.html)

I'm looking for a simple system that does not need to be electrically powered for outdoor use. (I live in an apartment and would have to set up the unit outside my building.)

Are there other passive outdoor DIY systems you'd recommend? I want to try something simple for outdoor use.

thanks!

shireen

Comments (34)

  • lastobelus
    20 years ago

    I am also interested in feedback on autopot, or more specifically on the smart valve. I'm thinking of building my first hydroponic setup with smartvalves, because:

    -- low maintenance, forgiving for forgetful folk like me
    -- no pump sound (I'll be gardening indoors)
    -- since a smart valve costs less than a pump, I figure the cost will be lower

    but I'd like to hear that it does in fact give good results, without bubbling in the reservoir.

  • lastobelus
    20 years ago

    ... it seems like I could get away with not having an EC meter with the smartvalves, because the solution does not recirculate.

  • sigma
    19 years ago

    Go to: http://www.agriorganics.com/products/auto_pots.html
    for a how-to schematic and you can see there is no need to buy all of the plastic stuff from the vendor. Just buy the Smart valve and assemble the rest to fit your needs. I would add an airstone and pump as an improvement.

    Has anyone done this? I look forward to hearing from you.

  • sgmd
    Original Author
    19 years ago

    Hi Sigma ....

    my message was back in April ... since then I bought the Autopots from futuregarden.com and used it last summer to grow tomatoes, basil, and eggplant outdoors. I was very happy with the product and highly recommend it.

    But I do have one suggestion ... make sure to use Rubbermaid tubs as the reservoir because it's the only one I could verify to be food grade plastic.

    cheers,
    shireen

  • hydro4me
    19 years ago

    I am glad I came across this post. I have a small 6x8 greenhouse in the backyard with no electricity yet, just setup last fall. I may have to check into the Autopot and the Rubbermaid tub would help absorb heat during the day and radiate heat back at night.

    Thanks Shireen and Sigma! -Jason

  • hank_mili
    19 years ago

    The Smartvalve is an innovative idea. It certainly appears to be a "set and forget" system with definite advantages. One of which is no electricity required. However, I have some thoughts I'd like to put out to the forum.

    1. As the solution is reduced in the container by transpiration and evaporation over time it will get more concentrated. This is because not all of the nutrients are consumed within every unit volume of water. So over time the EC will ramp up until the refill cycle starts over in which case the EC will fall suddenly. So what you got here is a "saw tooth" pattern to the nutrient concentration. Because not all nutrients are used up one should see a "saw tooth pattern" to the EC on an upward curve.

    2. As nutrients are consumed the pH usually goes up. So again I suspect the pH will climb up as nutrients are consumed but because the EC is increasing the pH should not ramp up as much, relatively speaking. Again as the refill cycle starts the pH will drop but not to the level in the previous cycle. One should see a lower amplitude "saw tooth" pattern on an upward curve.

    3. Unless the medium is leeched periodically the left over salts will accumulate.

    4. I curious to know what is the rate of the refill cycle.

  • sgmd
    Original Author
    19 years ago

    > As the solution is reduced in the container by transpiration and
    > evaporation over time it will get more concentrated. This is because
    > not all of the nutrients are consumed within every unit volume of
    > water. So over time the EC will ramp up until the refill cycle starts
    > over in which case the EC will fall suddenly.

    BTW, the evaporation from the pot reservoir itself is quite minimal.

    Commercial growers would base their nutrient ratios on tissue analysis -- ideally, that's something we would all like to do. But if you have thirsty plants like tomatoes, and you follow recommended ECs for your plants, and optimal nutrient ratios for the different growth stages, you won't have any major problems. I grew some real beauties last summer. All I did was follow the instructions on the label of the Fl*ra series nutrients. (BTW, I used the regular Fl*ra series, *not* Fl*ranova, which I don't particularly care for.)

    note -- asterisks are there to protect list from spam.

    I never had a problem with accumulated salts either.

    The only annoying thing was rain which would occasionally upset the EC. This summer, I want to rig up some kind of "umbrella" over the top of the substrate to keep out as much rain as possible but keep the air circulation going.

    Can't tell you much about the refill cycle for each plant -- all I can say is that the 10 gallon reservoir for my 4 pots (2 tomatoes, basil, and eggplant) had to be 80% replenished about every week, depending on the weather, during peak growth. Just a rough estimate.

    cheers,
    shireen

  • hank_mili
    19 years ago

    Hi Shireen,

    Certainly can't argue with your results.

    BTW can you tell me the size of your pots?
    I can try to figure out the refill rate from that.

    Never thought about rain being a variable. But good idea using a translucent umbrella or equivalent to take that out of the equation.

  • suemalone
    17 years ago

    I have my Northern Light Greenhouse on order and will be using Autopots. question; how cool is okay for the plants at night? Would a heater or reserviour heater be needed or even useful? Winters in West Texas mostly hover in the 40's, but we can go a week at at time in the 20's & 30's.
    I was hoping not to have to use electricity due to the intended location of the greenhouse. info & suggestions welcome.

  • cheaphardwarez
    17 years ago

    I have two auto pots they are doing great. I am also growing 10 10" pots in a small "kidie pool". I wait for it to get dry then refill to 1-2 inches deep. It is so far a week be tween fills and the pool plants are doing just as well as the autopot plants. However, I suspect that evaporation could be a problem..

  • edurink
    17 years ago

    When I was in college, laboratory work in one of my subjects was spent in a poultry farm. The water feeder we used looks works like an autopot. With slight modification, it can be used for hydroponics.

    Here is a link that might be useful: {{gwi:1003994}}

  • tominnh
    17 years ago

    Does anyone have pictures of the installtion of these Autopot Smart valves...? There is a link listed which is no longer valid.... Thanks

  • cheaphardwarez
    17 years ago

    Just an update.. Using the autopots as directed with their nutrients every single pland died before making. All my other hydroponic systems did very well.. Washing out the medium of the auto pot did seem to prolong the life of one plant..

    I think this method is better serverd using soil and water with very little nutrient mix...

  • willardb3
    17 years ago

    The smart valve, while is is cool engineering, does not mean that a reservoir pump/aeration is not required. Some form of energy is required to run an air pump in hydroponics.

    I know a chile grower who used the smart valve and no oxygen at all in the reservoir and all his plants died from pythium, one plant disease reservoir oxygenation is meant to control.

  • peckchoad
    17 years ago

    Has anyone done a comprehensive review of autopot performance as of yet? It seems like someone would have already taken a look at this, considering all the hype. Seems like people either think they're thebest thing since sliced bread, or a sham.

    If anyone knows an objective look at these things (e.g. not affiliated with the people who make the product), pelase drop a note. I'd like to get some for my school kids, but am hesitant without some kind of endorsement that is trustworthy.

    Suspiciously, I have never seen pics of plants growing in them online. If you have plants growing in autopots or with smartvalves, throw it up if you can.

    Thanks - pk

  • sgmd
    Original Author
    17 years ago

    they work great. i have some images from 2004 posted at
    http://home.comcast.net/~whimbrel/hydro_img/hydroponics.html

    Haven't had time to do more growing lately. But I love the autopots and will return to them when I have more time. The only minor nuisance is that the tubes and smartvalves occasionally get clogged (if you're growing outdoors). But it's pretty easy to clean. Just keep an eye out for wilting leaves -- if the reservoir is full, then it is time to do a little cleaning. But it's not a big deal, unless you're running several hundred of 'em,

    Really important to do this: cut out some fine mesh netting and line the bottom of the pots with it. Those tomatoes have crazy roots and you want to keep them away from the smartvalves!

    cheers,
    shireen

  • markjd
    17 years ago

    In my small glasshouse, I have used a smart valve II in a passive hydroponic system. Instead of using multi Autopot systems, I built a 2.5m x 90cm x 20cm bed containing a 50:50 perlite/vermiculite mix and contained and covered it with some stiff plastic sheeting purchased at the hydroponics shop. I cut some holes into the top sheet to place plants and attached string to the plant from the glasshouse ceiling. I attached the smart valve II to the inside of a garden pot and used shade cloth to exclude the growing medium.

    As my main interest is chiles, eggplants, and tomatoes, these are what I have predominantly grown. The plants have grown extremely well, with many fruits produced.

    The biggest problem I had was keeping up with the nutrient supply in the heat of Summer. Sometimes having to re-fill the 70L tank with water and nutrients 2 or 3 times a week.

    I can recommend the smart valve II for a passive hydroponic setup, but have no experience with the Autopots.

    Mark
    (Melbourne, Australia)

  • iamshark
    17 years ago

    [QUOTE] Posted by markjd (My Page) on Mon, Mar 12, 07 at 3:30

    In my small glasshouse, I have used a smart valve II in a passive hydroponic system. Instead of using multi Autopot systems, I built a 2.5m x 90cm x 20cm bed containing a 50:50 perlite/vermiculite mix and contained and covered it with some stiff plastic sheeting purchased at the hydroponics shop. I cut some holes into the top sheet to place plants and attached string to the plant from the glasshouse ceiling. I attached the smart valve II to the inside of a garden pot and used shade cloth to exclude the growing medium. [/QUOTE]

    I would very much like to see a picture if your ok with that. I would like to build one using a container like the one I have my Aeroponic Rig i posted pics of in the "what hydro system your using" thread here.

    Here is a link that might be useful: what hydro system your using

  • markjd
    17 years ago

    Iamshark, your hydro setup looks very good. Sorry to say I don't have any photos of my setup with plants in it :( My glasshouse is in disarray, and I will be taking it down shortly!

    I took some photos of the setup tonight after work. After reviewing the images, I decided my current hydro setup has seen better days LOL It looks so bad, I am embaressed too to post any images. No plants in it for quite a while, looks filthy , and Kikuyu grass still growing strong despite two hits of Roundup in the last month :)

    However ... the smart valve is in a garden pot on the left hand side of the bed. I have a 70L plastic garbage bin sitting on bricks kept on the other side of the glasshouse with the outlet slightly above the top of the hydro bed so it can run out via gravity.

    The trickiest part was working out how to put the smart valve in the hydro media bed so that it would not be fouled by the media and would be free to move. The cheapest way I could do it was to attach some shadecloth screen to the inside of a garden pot and screw the smart valve to the inside of the garden pot. That way the garden pot could be pushed into the media to whatever height I wanted to have the nutrient solution, and the shadecloth would be fine enough to keep the smart valve free of media.

    If you were so inclined, I am sure you could engineer a better looking device to hold the smart valve to keep it clear of media in your container. Maybe a lunch box with holes drilled in the side or something like that? Might just be easier to buy an Autopot system :)

    Mark

  • iamshark
    17 years ago

    lol..buy one? NEVER!
    I think I can come up with somthing though. I already have a couple ideas in mind. I will sketch somthing up in AutoCAD
    work out the bugs. But in a quick scribble it would work like this: Hope the image isnt to large..oh and I would use a growing medium layered perhaps, clay pellets, cheese cloth, perlite and coco choir.. my spelling sux

    {{gwi:1003995}}

  • markjd
    17 years ago

    I can see you might have a problem with your design with your placement of the smart valve.

    The smart valve is designed to be immersed in the media, sitting in water. When the water falls below a certain level, the smart valve opens up and floods the media bed. When the water rises to a certain level, the smart valve closes and stops water from entering the media bed. There is a piece under the smart valve that rises and falls according to the level of the water.

    Your idea of the emergency tank for overflow is a good one. I have had the unit flood my hydro bed a couple of times due to the smart valve getting fouled. Might also be worth putting a small inline filter between the nutrient tank and the smart valve. They usually sell them with the smart valve.

    Mark

  • edurink
    17 years ago

    Here is a simple arrange that might be useful.

    Here is a link that might be useful: Experiment

  • intellectual_menace
    16 years ago

    i was thinking about setting up a smart valve with a 1/3 perlite, 1/3 vermiculite, and 1/3 soil. anyone have any feedback on how this should work? What might be the maximum amount of soil i could use and still have effective water transport ?
    thanks
    IM

  • davesr1975
    16 years ago

    i have an autopot system consiting of 32 pots they work wonders i left them unattended for a week and a half and found no stress

    i have a basic setup instead of using a barrel for my setup i used one sixty gallon watering tank for stage 1 of potting and a 30 gallon for flowering both unit are connected to pvc piping i have on/off valve for each tank and are stage in two half with shut off valve's first half is being deleveried with nutrients for stage one of development second half stage two development.... autopot module are setup between those shut off valves... pvc pipe are tape with 1/4 barded fitting for tubing tobe connected to autopot module

    both tank have powerhead sweep pump which push water out from right to left which where made for fish tanks, they have two purpose one for areation two for even nutrient mixture at all times, no need for air stones in each tray....

    autpot module are great i started out with six trays complete kit thats 12 pots in all decided to go bigger but didn't want to spend the cash although i was already getting my money worth by elemanating extravigent hydroponic tables etc... i order under the bed storage container drilled 1\4 inch hole for placement of feed line to the autopot module i have four ten inch pots to one tray i cut down a lot of space being used and added more pots i cut holes in the lids for pots to be place in....

    my last addition that i have being trying out on a few of my trays i don't have co2 injection in my grow room but i brought redsea co2 injection kit that put co2 directly into the water also a fish tank item its been two week now i notice a big difference leave fans are bigger not taller but bigger and much greener and the tray have produce what looks like algae i will be placing fish in those trays if they survive longer then a day i might have something working here...

    list of product and pricing

    tanks northerntools.com
    60 gallon 119
    30 59.99

    gorrilla rack 1500 lbs per shelf 4 tier
    sams club 139.99

    futuregarden.com
    autopots and fitting 6 tray 300.00
    but if you go my second route save you a lot of money just buy the autopot mkII module's 19.99

    amazon.com
    under the bed storage trays 69.99 pack of 4
    walmart 10" pots 99 cents
    i have 8 trays at 140.00 and 32 pots at 32.00 total of 172.00 compared to 300 i spent for 6 autopot kits at 12 pot at future gardens

    powerhead sweep pump 270 gph walmart 2x15=30.00

    you have to do you homework on the autopot module mkII understand how they work then you will have the concept on what you can do to cut down your cost learn from my mistake

  • tanuvan_yahoo_com
    16 years ago

    I have a bunch of the smartvalves, and a few trays. I am trying to rig up my own rather than buying all the plastic that goes with them.

    So, are you saying you have 4 10in pots and 1 smartvalve per under the bed tray?

  • bruce_mc
    16 years ago

    Hi

    My first post but thought I would descibe my system as it is somewhat cheaper.

    I use the bottom half of 3 litre milk containers as pots and grow outside

    I have made trays out of timber that are internally two containers wide (narrow side) and 2 and 2.4 metres long (to fit space) they are about 5cm (2 inch) deep

    I lined these with plastic

    Used 60 litre bin and one valve for each tray

    This gives about 32 pots in the largest tray

    This is the first year I am trying this system and being in Oz it is still early in the season

    Crops
    Peas 4 to pot (first planting in system) 10ft high (just about out of room)

    Beans Going strong but only 3' tall so far

    Strawberries Looking good but but early season yet

    Sweet Pepper - Going strong - First flowers just forming

    Silver beet looking good

    Impatients Going well


    Some points

    Valve needs to sit on a hard surface (plastic will seal base and stop second sycle)

    Use rectangular containers as avoids open water

    Any rectangular containers would work but build tray to fit snugly

    I use course perlite and good quality powder nutrient

    Salt should not build up as all /most liquid used each cycle

    Do not worry about rain as trays just overflow and the large tray means a new cycle does not take long to roll around (may be a problem if you get some rain on a daily basis)

    Do not use a EC or PH meter (just measure out nutrient)

    Easy to extend the time a tank lasts (if going away or something) as you could just add another tank in series

    Get the cover as then you can just put a weight on top to hold it flat (and keep out bits of perlite etc)

    Hope someone finds these thoughts useful

    Bruce

  • tanuvan
    16 years ago

    Hi Bruce,
    Your information is very useful, as I was wondering how many containers one of the valves will efficiently water. At least in my MK2's, the water doesn't necessarily flow out of them particularly fast.

    Your one valve seems to be sustaining quite a few plants.

  • bruce_mc
    16 years ago

    Thanks

    I figure that it does not matter how fast the empty / fill cycles, In fact probably the faster the better as this would reduce the potential for problems of evaporation and rain dilution.

    While flow rate is slow you would be suprised how much it can handle - 60 litres will empty overnight (my lesson in needing a hard base under valve) and this amount is still lasting over two weeks though I expect usage to go up as the plants grow and the weather heats up

    Though if the valve could not keep up (unlikly I think) it would be easy to divide the tray in two (long and narrow) and put valve at each end.

    I also have the trays on the deck so do not need benchs or such

    Keep us posted on your design

    Bruce

  • davesr1975
    16 years ago

    yes! that is correct...

    I learn from experience that the mkII the more it stay on to fill the reservoir(tray) it goes bad so I suggest consider the size of the pots and tray I have 4 10" pots in each tray which is the recommended pot per smart valve if you go smaller the more pot you can have per tray the mkII only fills tray to about 5 in on a flat surface you can raise the smart valve with in the tray to get desired level but the higher it gets the more at risk you can damaged the mkII

    remember if the mkII is damaged two option smart valve stays open or closed and if your like me my grow room is design to be self reliant.. I don't want to go in their unless I have too, so if it stays open it will keep filling until the main reservoir is empty... unless your are outdoor's with your..
    I'm in indoor if you have any other question please fill free to contact me people helped me over the years understand hydroponics' I'm willing to help as best as possible although I still haven't mastered it all that's why I try to buy thing that are self reliant...

    I have work with ebb flow trays and tables oversized tubs can be a challenge, especially in the beginning and its not enough time in the day with family and work to make sure everything functionally properly....


    davesr1980@aol.com

  • davesr1975
    16 years ago

    i added the fish that night the next day i expected to see fish on the floor or dead but they look excellent maybe i done something right i may go with this setup and nutrients i made with my new addition, if you would like to know what i done check out autopot.au web site, and you can get pictures and thier setup ideas and come up with your on maybe we can exchange ideas,

    another thing i would like to add i just name the things that i started my intial setup with to go with my new setup.

    alot of things i had from dealing with other systems that i have used in the past when i was comfortable with the autopots i got rid of my other stuff and went all out with the mkII modules....

    my intial growroom is 15x15 with what i call my utility room off 8x15 to the side which contain my tanks ballast,controllers and etc...

    i suggest if your not going 20 or more pots don't go with a tank of my size i have a 15x15ft room i can add a lot more then 32 that's the reason for the large tank..

    rule of the tumb the bigger you go the more it will cost...

  • tanuvan
    16 years ago

    I am going with 4 2Gal square pots right now. I have 6 MKII's and was using 1 MKII per plant for now. They are each in a 6.5 qt rubbermaid container that holds a square pot and valve nicely.

    The containers are about $2 each. Much cheaper than the entire autopot kit.

    I am debating on adding a larger tray and using 1 valve per 4-6 pots. It will probably have to wait due to the winter coming. I will be growing indoors until it warms up a bit.

    davesr1980,
    I looked at the design of the MKII and I can't see how it being stuck open or close would have any effect on the longevity of the valve.

    Could you explain how yours were affected?

  • davesr1975
    16 years ago

    a groove was craved into the valve flat surface that close the inlet from stopping water to travel inward, was told it was caused by over extending the valve because of long drainage this was told to me by autopot.au maker of the autopots... picture where sent they also sent me two new valve at that time, remember where working with plastic not Teflon... but they do have a very long life Spain. I had the valve 2 1/2 years before it failed, but I had room full of water just trying to keep future autopots user aware you maybe more lucky then I was

    but the second instance was where a piece of perlite got in between the valve and float and keep it from closing.....

    over time you also get a nutrient build up that also can keep your valve from opening or closing a drainage block or a build-up that keeps the valve inlet and float from a flat contact which intern keeps the valve to remain open...

    please don't just buy a new valve soak your valve in what ever solution you want I used alcohol which remove most of the nutrient build up and back working to normal status

    tanuvan i hope this may help you,

  • tanuvan
    16 years ago

    davesr,
    I see what you mean. You are talking about the rubber flat gasket that covers the valve opening. I understand, and will be sure I keep an eye on that. Thanks for the tips.

    I wonder if the inventor could have made the entire casing out of something a bit more durable...like cast aluminum. Or Teflon as you say.

  • plantboy_grower
    16 years ago

    http://www.freewebs.com/edurink/solfeeder.jpg

    Would just like to point out the MKII is different from the above link, because the MKII allows the tray to drain entirely before a new flood begins. I think the above link is a great start but the MKII has the advantage of completely using up all the water before flooding again.

0