


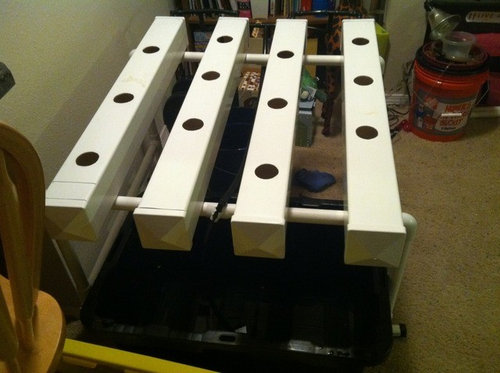
NFT System '12
ethnobotany
11 years ago


Sort by:Oldest
Comments (18)
Related Stories
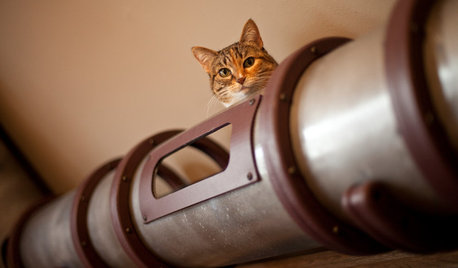
FUN HOUZZGeek Lab: How to Build a Steampunk Cat Transit System
Give your kitty another avenue for fun with a tubular walkway system that lets him go his own way
Full Story
GREAT HOME PROJECTSHow to Add a Radiant Heat System
Enjoy comfy, consistent temperatures and maybe even energy savings with hydronic heating and cooling
Full Story
HOME TECHTote Your Tunes to Any Room With a Portable Wi-Fi Sound System
Free your home's music setup from wires with Wi-Fi speakers that let you take high-quality audio anywhere
Full Story
ORGANIZINGWant to Streamline Your Life? Get a System
Reduce stress and free up more time for the things that really matter by establishing specific procedures for everyday tasks
Full Story
MOST POPULAROrganized From the Start: 8 Smart Systems for Your New House
Establishing order at the outset will help prevent clutter from getting its foot in the door
Full Story
HOME TECHEmerging Virtual-Reality Home Systems Might Blow Your Mind
Get near-total immersion in home entertainment with virtual-reality gadgets worthy of a sci-fi flick, coming soon
Full Story
HOUSEKEEPING5 Steps to Improve Your Heating System Now
Increase your heater's efficiency and safety for lower energy bills and greater peace of mind this winter
Full Story
ORGANIZING8 Steps to a Winning Filing System
When you streamline your paperwork and digital files for easy use and maintenance, it's an organizational triumph
Full Story
LIFE12 House-Hunting Tips to Help You Make the Right Choice
Stay organized and focused on your quest for a new home, to make the search easier and avoid surprises later
Full Story
STORAGEBedroom Storage: 12 Ways to Work Your Wardrobe
Instead of letting the mess in your closet overwhelm you, tackle it head on with these smart and simple solutions
Full Story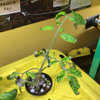
grizzman
ethnobotanyOriginal Author
Related Professionals
West Milford Landscape Architects & Landscape Designers · Beachwood Landscape Architects & Landscape Designers · Graham Landscape Architects & Landscape Designers · Piqua Landscape Architects & Landscape Designers · Taylorsville Landscape Architects & Landscape Designers · Crystal Landscape Contractors · Ellicott City Landscape Contractors · Huntley Landscape Contractors · Kaneohe Landscape Contractors · Lebanon Landscape Contractors · Middleton Landscape Contractors · Morrisville Landscape Contractors · San Rafael Landscape Contractors · Weymouth Landscape Contractors · Wilton Landscape Contractorscole_robbie
grizzman
ethnobotanyOriginal Author
cole_robbie
grizzman
ethnobotanyOriginal Author
grizzman
ethnobotanyOriginal Author
cole_robbie
grizzman
chadryan
grizzman
chadryan
ethnobotanyOriginal Author
cole_robbie
chadryan