


home made drip ring tip
hank_mili
19 years ago
Sort by:Oldest
Comments (17)
Related Stories
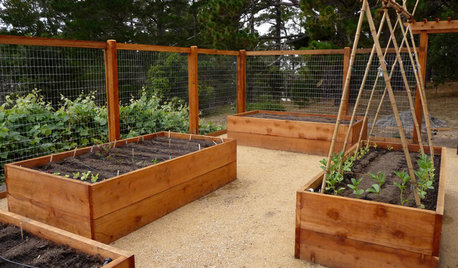
GARDENING GUIDESHow to Install a Drip Irrigation System
Save time and water with a drip watering system in your vegetable garden — a little patience now will pay off later
Full Story
DECORATING GUIDESThe Dumbest Decorating Decisions I’ve Ever Made
Caution: Do not try these at home
Full Story
HEALTHY HOME6 Tips From a Nearly Zero-Waste Home
Lower your trash output and increase your quality of life with these ideas from a mom who did it to the max
Full Story
MOST POPULAR33 Magic Household Cleaning Tips
Houzzers from around the world share their tips for transforming housework into child’s play
Full Story
GREEN BUILDINGHouzz Tour: An Innovative Home Shows What It’s Made Of
Homeowners design their Washington, D.C., residence with sustainability in mind and to accommodate them as they get older
Full Story
DECORATING GUIDESQuick Fix: Erase Water Rings from Furniture
A few household items can quickly rejuvenate tarnished wood tabletops
Full Story
HOUSEKEEPINGHow to Remove Water Rings From Wood Tables
You may be surprised by some of these ideas for removing cloudy white water marks from wood surfaces
Full Story
DECORATING GUIDES13 Decorating Tips for Short-Term Renters
Mirrors, curtains, lamps and other features set a stylish tone you can take with you
Full Story
GARDENING GUIDES10 Tips to Start a Garden — Can-Do Ideas for Beginners
Green up your landscape even if you're short on time, money and knowledge, with these manageable steps for first-time gardeners
Full Story
LIFESlow Living 101: Tips for Turning Off the Chaos
It may feel as though you're too busy to slow down and enjoy life. But even little changes can have a big effect
Full StoryMore Discussions
pepperbox
hank_miliOriginal Author
Related Professionals
Glendora Landscape Architects & Landscape Designers · Hershey Landscape Architects & Landscape Designers · Redondo Beach Landscape Architects & Landscape Designers · Brooklyn Center Landscape Architects & Landscape Designers · Milford Landscape Contractors · Addison Landscape Contractors · Cary Landscape Contractors · Cicero Landscape Contractors · Cockeysville Landscape Contractors · Coeur d'Alene Landscape Contractors · Fuquay-Varina Landscape Contractors · Kahului Landscape Contractors · Middletown Landscape Contractors · San Carlos Park Landscape Contractors · Southbury Landscape Contractorsgooselady_OR
hank_miliOriginal Author
bamf
hank_miliOriginal Author
hank_miliOriginal Author
bamf
hank_miliOriginal Author
chefmichel
hank_miliOriginal Author
wampuscat
hank_miliOriginal Author
wampuscat
chefmichel
hank_miliOriginal Author
thanate191