Shop Products
Houzz Logo Print
chrisswede

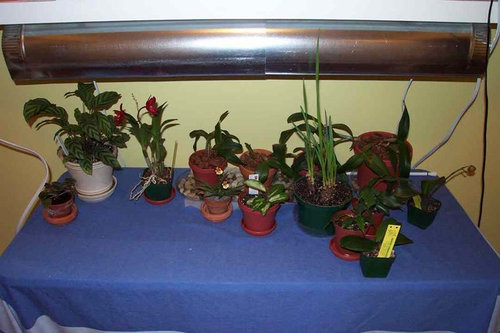
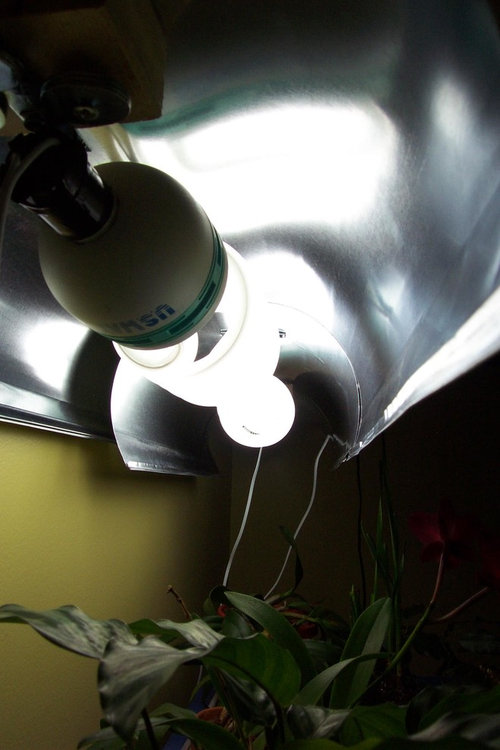
My homemade reflector setup for 85W CFL

ChrisSwede
19 years ago

I have read a lot of the posts on this forum and have got a lot of help so I thought I'd share my experience.

I just made a homemade reflector setup.

I ordered two 85W CFL from topbulb.com

I then bought two 6inch diameter 2 foot vents to use for reflectors. I also bought 2 lamp cords, two sockets with a little metal plate attached so they can be mounted horizontally and a 2-by-4. After working for it for a couple of hours this is what I ended up with. My wife still wants to paint it and I need to adjust the reflectors a little.

Hope this helps or inspires anybody in their search for light.

/Chris


Comments (9)

  • zink
    19 years ago

    Chris,

    Those vent pieces do make excellent ULTRA-cheap reflectors. I made five reflectors that way using the 2-foot lengths.

    After painting one of the reflectors flat white, I compared it to an unpainted reflector. The flat white one seemed to cast a more even light, so I painted all of them flat white.

    I would never pay money for a reflector after seeing how well this method worked for me.

    Great idea!

    Zink

  • zink
    19 years ago

    Chris,

    I forgot to mention one thing. I fashioned a metal brace to spread the reflector apart, for better coverage.

    From your photos, it looks like the light is being cast in a very narrow strip. However, that may be your intent - to keep all of the light concentrated on your shelf.

    Whatever, your method does allow you to add any size brace later on, to optimize/customize the light spread. You get the reflector you want at almost no cost.

    Zink

  • ChrisSwede
    Original Author
    19 years ago

    Thank you Zink.
    Yeah, this was a lot cheaper than buying any kind of professional setup. Not as professional looking, but not too bad either.
    What specific type of brace are you talking about? I agree that the light needs to be spread a little more and was going to use maybe a long strip of metal along the inside and fron facing side to attach it to the shelv - resulting in less curvature and more spreading of light.

    If my cattleyas have not flowered in three years! If they do not flower under this setup I give up. :)

    /Chris

  • gawdly
    19 years ago

    Chris, are you happy with the 85W bulb from TopBulb? I just bought one last night and hope it lives up to my expectations!

    Sam

  • ChrisSwede
    Original Author
    19 years ago

    Sam,
    I am really happy with it so far. It was bigger then I thought when I received it. I turned it on and it is so bright it hurts your eyes to look at it. They are MUCH brighter than my 2 tube 20 watt setup - not surprising!
    Hope you like them too.
    Chris

  • gawdly
    19 years ago

    I had 2 85W bulbs from another company. One, I jostled a bit too much and the base pulled off of the ballast housing, so that's why I'm replacing it. I've had my other one for about 4 months at least now, so we'll see how much brighter than my current bulb it is.

    Can't wait! My plants have been living with a 42W bulb in its place since 2 weeks before christmas.

    Sam

  • zink
    19 years ago

    Chris,

    By brace, I meant just adding a 12"-13" piece of metal at each end to spread the vent apart.

    With a larger radius vent piece you can make really good reflector for an HID light, too!

    Off the topic, I noticed that your widest JPG established the width for all of the replies
    which followed your post. None of the paragraphs were long enough to wrap around. One of
    the standard Gardenweb HTML codes sets column widths using a "table width=90%" HTML
    instruction. That instruction, combined with you widest JPG, makes it seem as though the
    paragraphs also have a wide indent on the left.

    I'm not being critical or anything like that. It just took me awhile to figure out what was going
    on in the page formatting. I often have trouble figuring out how to make my message and graphics
    appear the way I want them to. You can reduce the HEIGHT and WIDTH of a graphic
    to make them fit better, but it it usually recommended that you shrink the JPG's instead, to fit
    in the column width.

    I cheated, and used NOTEPAD with normal 'carriage returns' to wrap this text

    Anyhow, great reflector idea!

    Zink

  • zink
    19 years ago

    PS - I meant to say you can adjust the HEIGHT and WIDTH using HTML code.

  • Sally_D
    19 years ago

    Very clever. Love your creativity.