Well as I mentioned in another post I think I found the perfect location for a lighted grow rack, in an unused bathtub in our loft bathroom. Feel free to critique it. Just don't critique the dirty-looking floor of my bathtub....I've been tracking my muddy shoes in and out of it while I worked lol.
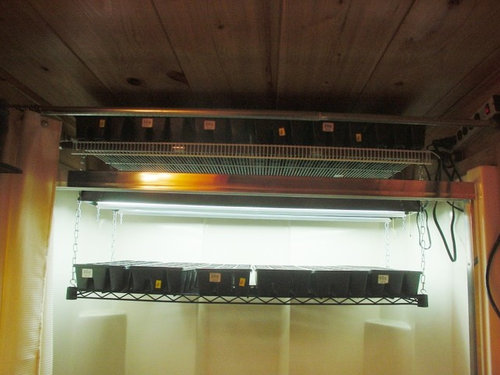
The bathtub perfectly accomodated 4 foot long shelves however I was limited in the width by the base of the tub which was just a little over 18" at the very bottom. So if I want to use the full height of the enclosure from floor to ceiling then 24" shelves were out of the question, at least on the bottom half. I know alot of standard flats are approximately 22" so if I get some of those they'll just overhang some on each side. However, I am currently getting free 18 plant flats from Lowes and theirs are exactly 18" long so that works out. As you can see I have room to hang at least two more tiers of lighted shelving underneath this one, but I didn't want to get carried away until I tried one and knew it would work. The flats in the pics are currently empty, just wanted to see what it would look like.
This is a VERY tiny bathroom so I decided it would actually be much easier to hang the unit rather than erect a big old free-standing shelf. You can easily add, subtract or adjust the tiers as well as the lights with chains and "S" hooks, much easier to carry in the pieces than try to bring in an entire unit or try to build it inside of the bathtub.
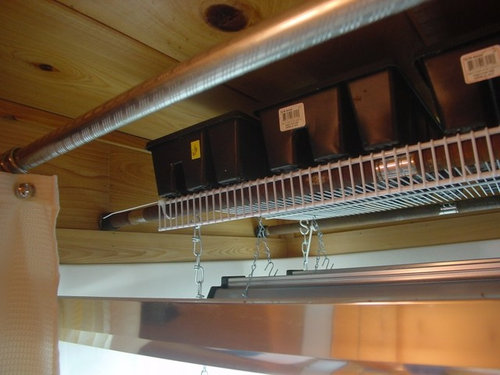
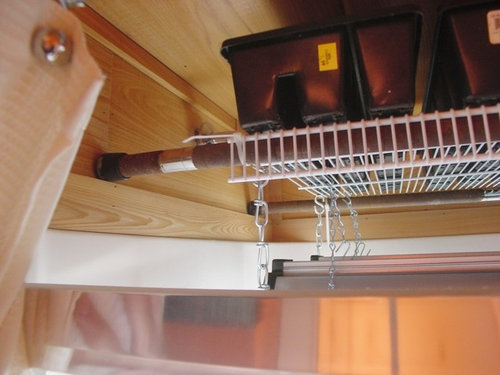
I wanted to use things I already had or had scavenged. I already had one of those $80 chrome 5-tier shelving units I bought from Lowes some years back to store my plastic pots outdoors, and since those are now being stored elsewhere it was just sitting empty. However it was rusted so badly that despite WD-40 and a couple of hours of effort it could not be re-configured, several sections of legs and 2 of the shelves were completely stuck. So after deciding to instead hang the shelves I cannibalized the portions I was able to get loose. I saved two of the 6 foot legs which are very rigid and sturdy, cut them to the span of the bathtub and added some 1" rubber chair bottoms to cover the ends. These chair bottoms are identical to the rubber ends on a shower curtain rod. Except for the top shelf which I added to sit across the steel cross pieces, all of the lower shelves are the 18" X 4'ones from the chrome unit. That big reflective thing in the foreground is the track for sliding shower doors which we never installed and instead went with a traditional shower curtain. It's kinda' in my way so I'm going to remove that whole track (finally). I'm also going to securely mount the power strip to the wall and tidy up the electrical cord situation so it runs tightly along the trim boards and down to the electrical outlet. I can't stand a mess of electrical cords, this was just temporary to get it up and running tonight.
I did buy a 20" X 4' long wire closet shelf from Lowes which sits on the top of those two cross pieces. I quickly zip tied it to the two rods which locks everything on that level together. There is a little room between that shelf and the wooden ceiling so I plan to use that rack as my seed germination level since they don't really need light until they germinate, at which point they'll be moved down to a lower lighted tier.
I also plan to line the bathtub on three sides, possibly the ceiling as well with mylar. I may even hang a homemade mylar curtain between the shelves and the exterior shower curtain. I don't know if all that will be necessary. Will have to see how it goes. I can also add small fans to each level if needed to help the seedlings grow sturdier and will eventually add a light timer, for now doing it manually. Right now I've got the lights on a power strip so I can just flick the switch and both come on or I can use the pull chains for individual units.
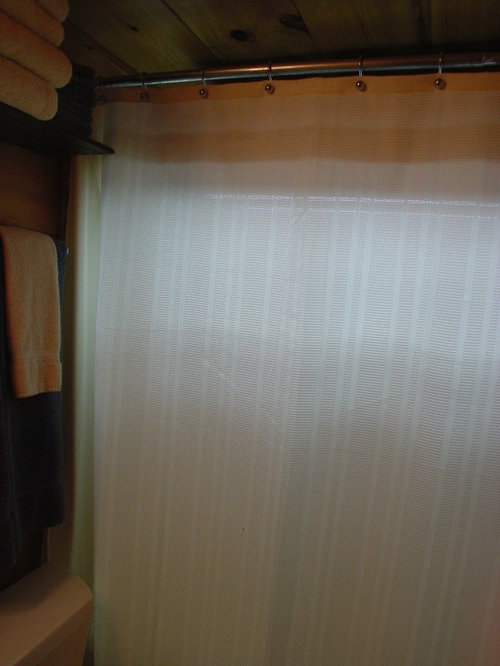
What I like about this set-up is that room stays between 70 and 80 degrees on any given day, even in the winter time. Being at the top of the house and the adjacent office containing loads of electronics, it is always warm up there so I don't think supplemental heat for germinating will be necessary. Also, I still have a regular pretty fabric shower curtain in front of everything so I can just pull the curtain closed and TA-DA! It's back to a useable bathroom for guests with no one the wiser. That bathtub has never once been used in the 10 years we've been here for anything other than storage.
Of course, even with the shower curtain closed if the fluorescents are on it's not completely disguised as a bathtub. Oh well.
I cannot wait to start some veggies and flowering plants in this puppy!
Thanks to everyone else who has posted their setups for inspiration. Danielle




hudson___wy
squirrellypeteOriginal Author
Related Professionals
Derry Landscape Architects & Landscape Designers · Ashland Landscape Architects & Landscape Designers · Anderson Landscape Contractors · Aberdeen Landscape Contractors · Holland Landscape Contractors · Rosemount Landscape Contractors · Goose Creek Fence Contractors · Manorville Fence Contractors · Olney Fence Contractors · Sandy Fence Contractors · Omaha Roofing & Gutters · Portage Roofing & Gutters · Thousand Oaks Roofing & Gutters · Burlington Roofing & Gutters · Manteca Roofing & Gutterscurt_grow
squirrellypeteOriginal Author