Hi everyone,
So, (fingers crossed) my 2nd batch of seeds seems to be doing really well. All of them germinated, and most are well on their way to developing their first set of true leaves. I thought that I'd share my process here in one chunk before I forget, and also so that other beginners can have a more consolidated list of things to try, rather than piecing together advice from here and there. I'll try and explain as best as possible - please chime in if you have anything to add or any questions or corrections!
I should start by saying my first batch of donated seeds did not go well, although once I figured out what I was doing wrong, I managed to save a couple. It just goes to show you that these guys WANT to grow, and are pretty forgiving -- in many cases, they'll wait for you to figure it out, then they'll keep going!
So, first a "don't" (from my experience):
- Don't let the seeds get too hot and/or wet before germination -- especially without proper air circulation!! They will bake!
For me, this translated into don't try and germinate the seeds in a covered container in sun or part-sun. Looking back, I feel a little stupid for not realizing this sooner!
Here's the process that worked for me:
1. I got fresh seeds from BBB - I chose parent plants that I liked, but I also got the cheapest ones possible so I wouldn't cry if I killed them all. :)
2. I did the initial germination using the styrofoam/floating seeds method. I first soaked the seeds overnight in a mix:
- 4oz h2o2
- 1pt distilled water
- a couple drops of superthrive
I soaked a paper towel in that mix, placed the seeds on the wet paper towel in a single layer, and covered them with the other half of the paper towel. I then placed the wet paper towel with seeds in a covered tupperware container and let them sit overnight.
In retrospect, I think I could have skipped this step, since I was about to stick the seeds in water full time. It also made their seeds coats really soft, so I had to be really careful not to damage them as I put them in their styrofoam boats.
2. I got a bigger clear plastic tub and filled it with about 1.5"-2" of the same water/h2o2/ST mix as the seed soak.
I cut up some styrofoam plates (easier than finding non-biodegradable peanuts) into strips, and used scissors to make slits/holes for the seeds, and wrote the seed names on the foam strip. I carefully inserted the seeds into the holes, wingtips sticking up through the hole in the foam. In some cases, I found it was easier to try and pull the seed up through the hole by its wing rather than push the fat part of the seed through. It was at this point that I also added in the seeds from my first unsuccessful batch that still looked viable.
I covered the bin with its clear lid, and placed it on top of an incandescent tube light (like jandey's set up) for a little bottom light and warmth. I put the entire shebang on the range top (we have one of those flat glass cook-tops) and turned on the stove lights, since they are halogens and also emit bright light and warmth.
After about 24 hours, all seeds had roots starting to pop out!
3. Once I started to see roots, I potted the seeds up in deep seed starting containers, or old six-pack annual containers that I had thoroughly washed out. I used Al's gritty mix.
4. Now the seeds are inside at night with the stovetop lights and tube light set up, and are outside on the patio (on the ground) in the shade during the day. They get a tiny amount of filtered morning sun. Our afternoon temps have been in the high 90s-low 100s. I keep the individual containers in bigger uncovered plastic bins to make it easier to move them around, and they stay in these bins all the time (even at night). I occasionally take the individual containers out to rinse out the bins, but that's it.
Because they are in the gritty mix, and its so hot, I fully water them with the h2o2/distilled water/ST mix once or twice a day, as well as occasionally misting. The gritty mix doesn't hold perched water, so between that and the h2o2, I don't worry about rot. I tried just misting them at first, but it wasn't enough water for them. As soon as I actually started watering them, many of them took off.
5. I check them at least twice a day when I move them in/out, and help the bigger ones out of their seed coats once they have a defined stem and are starting to bust out on their own.
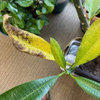
Before I mess with the seed coat, I thoroughly mist it and let it sit for a sec, so it softens up. I then VERY gently peel back sections of the seed coat starting with the wing. For the portion directly on the cotyledon leaves, I use the pad of my finger (not my fingernail) to gently rub back and forth to loosen it. As others have said, sometimes there's a transparent covering left - just rub very gently and it should come off as well. The cotyledon leaves may or may not kind of spring open at this point.
I've weeded out a few of the seeds that looked soft, or seemed really stalled out. Out of the original set of 27 (BBB sent extra!), I think I have 23 left that are growing. There are definitely some seeds going at a slower pace than others. Out of the three types that I got from BBB, the fastest ones have been the Chompoo Paan, then the Thornton Lilac, then the Plastic Pink (only one of the 6 has shed its seed coat. The others are still forming roots.)
And, that's where I am at this point. Aside from an interesting moment where I brought the seeds in at night and found a spider egg had obviously hatched nearby (it was like a tiny spider party hanging off the plastic bin!), everything has been smooth. I'm sure our warm temps have really helped, too.


plucrazy
jandey1
Related Professionals
Taylorsville Landscape Architects & Landscape Designers · Mount Wilson Landscape Architects & Landscape Designers · Barrington Landscape Contractors · Broadlands Landscape Contractors · Danvers Landscape Contractors · East Patchogue Landscape Contractors · Homewood Landscape Contractors · Riverhead Landscape Contractors · Wickliffe Landscape Contractors · Annapolis Siding & Exteriors · Beaumont Siding & Exteriors · Broomfield Siding & Exteriors · Chesterfield Siding & Exteriors · Point Loma San Diego Siding & Exteriors · San Bernardino Siding & Exteriors