


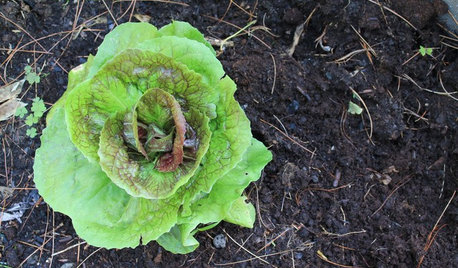
how do you get rose cuttings to root?
how do you get rose cuttings to root??????????????
Comments (49)

jrmankins
17 years agolast modified: 9 years agothe rose rustler's technique has worked for me for years. i buy several large plastic planters and fill them with sand. then take rose cuttings about 7 inches long, pinch out the soft top growth and pinch off all but the top 1 or 2 leaflets. then i sink about 6 inches of the stem into the sand. the roots develop at the buried leaf nodes, and more roots mean a better plant. water the pot really good and cover loosely with saran wrap or use the tops of clear plastic coke bottles. give the pots a bit of shade at first, to help them get used to things. the sand is really important to keep the babies from rotting. sand should stay damp. water regularly. new growth is a sign of rooting. when they get too tall for the saranwrap, take it off. leave them in the baby pot until autumn or next spring. then they can go into the real world.
bonnie_2006
17 years agolast modified: 9 years agoI root 6 inch cuttings in a clear mayonaise jar on my patio
Related Professionals
Grand Haven Landscape Architects & Landscape Designers · Harvey Landscape Architects & Landscape Designers · Bethlehem Landscape Contractors · Cudahy Landscape Contractors · East Chicago Landscape Contractors · Fort Worth Landscape Contractors · Golden Landscape Contractors · Golden Gate Landscape Contractors · Mahwah Landscape Contractors · Post Falls Landscape Contractors · Saint George Landscape Contractors · Teaneck Landscape Contractors · Wailuku Landscape Contractors · Sebring Roofing & Gutters · Chicago Ridge Roofing & Guttersbonnie_2006
17 years agolast modified: 9 years agocheck out this link
http://www.redwrench.com/garden/rooting.htmjoe_n_sc
17 years agolast modified: 9 years agoI use a good loose potting mix, dip the cuttings in rooting hormone, put them in small pots, put them in gallon zip lock bags, mist inside the bags a few times and them put them on my front porch in indirect sunlight and I have great luck rooting my roses. Hope this helps. Joe
bonnie_2006
17 years agolast modified: 9 years agozip lock bag method
http://members.fortunecity.com/cnetter/rose_tour/rose_cut.htmlfernisland
17 years agolast modified: 9 years agoMy own secret weapon for getting rose cuttings to start has been a bunch of green, one-gallon glass wine jugs with the bottoms cut out. This method has worked for me even when I had to be gone for several months at at time (overseas). One used to be able to buy bottle-cutting kits; one probably can find them on the web somewhere.
Dig holes about 6" deep & wide in the soil near a wall so there is some protection. Fill them with potting mix. Prepare cuttings (rjmankins posting of April 11 "rose rustler's technique" has it right!). Dip the cuttings in rooting hormone; plant them in the potting mix in the holes in the ground. Then upend the wine-jugs over the cuttings. In the winter up here, there is no need to water; in the summer, I leave a drip line close by.
I have found that when I use green glass jugs, almost all of the cuttings take, even when totally neglected. Clear glass or no glass has yeilded a much smaller success rate.
Cheap wine, alas, now comes mostly in boxes...
jrmankins
16 years agolast modified: 9 years agoFernisland, two litre green plastic bottles would probably work almost the same, tho of course not with the same beauty. They are pretty easy to find cheap, and easier to cut!
pkapeckopickldpepprz
16 years agolast modified: 9 years agoHow were you cutting the glass bottoms out of a green wine bottle? Do you do work as a contractor or something? I didn't think most folks have pro equipment like a tile cutter/glass cutter at their disposal.
triple_b
16 years agolast modified: 9 years agoGee thanks guys. Another plant propagating obsession coming right up. I have been reading this thread and the wheels are turning in my brain.
pierow128
16 years agolast modified: 9 years agoI have a glass cutter. I used to make stained glass for people as presents. People loved them but my glass supply shop closed down and never really got back into it. Still have the glass cutter though...
donnaz5
16 years agolast modified: 9 years agoin a hardware store, you can buy a blade for a hacksaw called a tile blade...it cuts glass..i used to make banks out of bottles with them when i was a kid...had alot more time and patience then!! i have found, though, that the green plastic bottles do work better than the clear ones...i think it must filter the sunlight...that's what i use now...donna
pkapeckopickldpepprz
16 years agolast modified: 9 years agoGreen plastic bottles like 7-up, Sprite or Mellow Yellow?
nami
16 years agolast modified: 9 years agoi just threw out one batch of cuttings that have rotted.
i want to try rooting again. i am concerned that my poting mix may have been wrong.
shud i try to root cuttings in sand? or a mixture of sand and miracle gro potting mix?
help!
wynative
16 years agolast modified: 9 years agoa friend is giving me cutting off of her beautiful yellow bush that she recieved cuttings from over 20 years ago! all this information has my confidence up :)
I have a pile of sand in my yard for a catus garden - altough it is kind of dirty ~ rocks, weeds and other stuff like that ~ would it be okay to use this? or as I know where I want the bush to go, just use the soil/green bottle method?
I am new to roses and have my first mini in bloom now. It was a gift and suppose to be yellow ~ a pale pink is pretty though LOL If this works out I am going to try some of the wild pink, red & yellow roses that are growing on the bank of our canal for a hedge.
thanks in advance!
Mariejeanim
16 years agolast modified: 9 years agoBumping this up as I'm interested in trying to root some cuttings and need all the help I can get!!
Jeani
zcat
16 years agolast modified: 9 years agoI use the zip-lock bag method, except I use small plastic nursery cups placed inside the zip-lock bag instead of putting the soil directly in the bag. So if you have any questions on the method maybe I can explain it in a different way or help walk you through it. It really is easy.
mgleason56
16 years agolast modified: 9 years agoThis has been posted before, but here goes;
I have a $20 shelving unit I got at HD. It has four shelves. I get 2 mil clear plastic and drape it on the shelving. More of a wind barrier than anything else. Next, I got a cheap Melnor timer from HD ($35), and a misting system called Arizona Mist & Cool ($20). The misters are tied to the shelving so that the top three units get the mist and the bottom just gets the overspray. Now I am ready to take some cuttings. I use, and after experimenting for three years am convinced it is the best, coconut coir. I get mine from a hydroponics store, but they also sell it at pet shops. Fill a small pot with the coir, make a hole with a screwdriver/pencil, etc, and place your cutting (after dipping in rooting hormone). I get visible roots in 2-3 weeks. By the way, this is placed in a place getting just filtered sun.
This is my summer method. There are recent posts out here explaining winter methods. Look under my last name, or better yet, George Mander's.
mareas
16 years agolast modified: 9 years agoWHAT to root in? Perlite or vermiculite ($4 a bag at WW) are better than sand, which tends to pack up and stop water flow, to fluff up rooting soil, or instead of soil.
Make sure than you are getting the cuttings BRIGHT indirect light & that the soil isn't waterlogged.
mgleason56
16 years agolast modified: 9 years agoWhich is why you should be using coconut coir as your medium....
rockyridge
16 years agolast modified: 9 years agoI am seriously downsizing my indoor gesneriad collection and was thinking of using my empty shelves to start rose cuttings. I have shelves with 3 florescent single fixtures per shelf for a total of 15 watts per square foot. I also have 2 x 4 ft. shelves with 4 - 40watt grow lights per shelf. The room stays at 60% humidity.
Is this a possibility? Has anyone tried it? Advice?
Thanks in advance,
Roxanne

Scott Wallace
16 years agolast modified: 9 years agoMy current batch is indoors as per the recommendations of George Mander. I used a 50/50 peat/perlite mixture, dipped the cuttings in rooting hormone, placed them in a large, clear storage bin and then put them under the florescent lights for 16 hours a day. Oh yeah, I'm also misting them once per day.
So far I have only lost 4 out of 45 cuttings, one of those because I put in in upside down. About a dozen have new leaves, the majority of the others have new buds that have formed, and most have roots growing out the bottom.
They are at 6 weeks today, so I have a feeling most will survive and be new plants.
ceterum
16 years agolast modified: 9 years agoI am sure that different techniques can and will work for different people, sometimes depending on the climate you live in. I use coco coir and have a misting table in summer. In fall I can use solo cups with coir or other sterile rooting compound without misting. Often I rooted just sticking the stem into the ground and if I chose the spot right, the cutting rooted during the winter months. Meanwhile the baggie method has never worked for me.
One summer almost every cutting rooted for me on the misting table in two weeks while in the next summer close to nothing rooted - despite the fact that the misting table, coir and rooting gel were the same. How come? I tried to come up with an explanation for myself by listing factors that were different in these two consecutive years.
1.) The first difference was that in year one we had a little rain almost every day while the next summer we were bone dry. That means that the quality of the cuttings was different, that is, I took cuttings from well-hydrated plants in year one but couldn't in years two.
2.) Another difference I noticed that while cuttings should be well hydrated, the soil should not be very wet because in that case the cuttings rot, not root. Several cuttings rooted for me in almost bone dry soil but never in too wet. So the misting system should mist the leaves but should not make the coir too wet.
3.) Many people said that the misting table should be set up in full sun. In my terribly hot and humid climate it is a death wish. In the first, successful, year the table was under the trees and the kiwi wines so the cuttings got a little direct sun in the morning and in the afternoon but they had filtered light most of the time. We took out a few trees during winter so in the next year the cuttings were more exposed to sun and drying winds.
4.) In year one my plants were very healthy with no fungal diseases because I was very diligent in keeping up my spray routine. Next year however due to health issues the spray schedule was lax. Consequently my cuttings were not super healthy and the leaves dropped while on the misting table.
5.) I am uncertain about the last point but I think in the first year I soaked the cuttings in a weak solution of Consan or hydrogen peroxide before inserting them into the coir while in the second year as I recall, I omitted this step.
What I wanted to tell you with these observations is that not so much the method or the rooting mix is responsible for success or failure but factors that are rarely mentioned because those who are very good in rooting do these steps without even thinking much about them (e.g.: water plants very well the day before you take cuttings) but for those who are new to rooting this small differences in the environment can make or break the endeavor.
pkapeckopickldpepprz
16 years agolast modified: 9 years agoExcellent points Ceterum. Sometimes it is the little things that make a difference. I am going to print out your post as there are some things I want to try myself. First I'd like to know what a misting table is? I have had lousy luck rooting this summer but I am in Florida. I've tried coir but as you have said maybe the coir was too wet. I will try it on the dryer side and just mist the leaves.
object16
16 years agolast modified: 9 years agoI read George Mander's method, and I do as follows.
I use standard 11x21 inch trays, with a black mesh basket for strength, pro-mix bulk potting compound mixed with 20% or so of sand to promote more drainage, covered with a 6" humididome brand name mondi (because it has 2 vents on top), with vents one quarter open, and 15 x 3 3/4 inch peat pots per tray. Trimming the top of the peat pot on two parallel sides helps it fit into the tray, otherwise it is tight. The peat pots are filled with medium, firmed in with fingers, then soaked in half strength no-damp (I use a rubbermaid tub for the soaking, they are totally drenched).
I take the cuttings in the morning, soft-wood or semi-ripe,
according to published standard methods. I use a spiral standard nail to poke a 1 1/2 inch hole in the medium, I use a 10ml. syringe to drop about 0.3 ml of rooting gel with fungicide into each hole. I trim the cutting at an angle just below the lowest bud, keep on the upper set or two of leaves, sometimes trimmed if the leaves are large, making sure they don't touch the sides of the dome. The cuttings are also dipped in the get, put into the hole in the medium, and them firmed into place with a pointed paring knife stuck about 2 inches into the medium parallel to the cutting. Four trays (60 cuttings) can be placed under a total of 4 four foot fluorescent tubes (long axis of trays at right angles to tubes), with tubes about 4 inches from top of tray. The vents in the cover are one quarter open, and I breath into the cover through the vents to make 100% starting humidity, and lots of carbon dioxide. I use a fan set on low aimed at the lights to keep the lights cool (they are most efficient at a cooler temperature, and the air circulation helps keep the trays at an even temperature). I use an electronic inside outside thermometer from wall-mart and put the probe at the end of the wire into one of the peat pots. The temperature should be 70-74 degrees. I have just put in some cuttings 10 days ago, and the cuttings all look great. I gently eased out a cutting, and it was already rooted, at 10 days! The roots are coming from the lowest bud, and I find wounding doesn't do anything, just causes a wound, but there are no roots from the wound, so I won't do this anymore. (I was wounding with a light scrape with a one edged razor at 90 degrees to the bud, but this seems to do nothing. What happens is the area of the bud starts to swell, and some callous develops, then a root will sprout). I have my lights mounted to the ceiling in my basement, and I suspend a plywood platform from the joists, by chains, so I can vary the distance of the garden from the joists by adjusting the chain. This allows me to still be able to walk through the room, despite it being occupied by a garden capable of holding 12 standard 11 x 21 inch flats.aroseenthusiast
13 years agolast modified: 9 years agoI am a novice at rooting roses -- I have only attempted to root one rose so far and it was successful.
Before I began the rooting process, I searched online for info on rooting roses (I didn't know about this site then!) and watched gardening shows to try and find out more on how to root roses. I was apprehensive, but I finally gave it a try and to my surprise it worked. The rose I rooted was a family heirloom rose that had been passed down several generations to my husband's mother by her great grandmother. The plant was dying out and I felt that I needed to try to root a piece of the vintage beauty before it was too late.
I located the pot I was going to use and prepared it ahead of time for the rose prior to cutting the plant. The soil was nothing but potting soil with a little bit of white vermiculite mixed in -- no sand at all! First I dumped all the dirt out of the pot into a bucket and placed limestone gravels layered in the bottom to enable good drainage. The stones were probably no larger than 1.5" in diameter. I replaced the dirt in the pot and prepared my cutting.
I located a healthy piece of rose for my rooting project. I located a piece of rose that resembled the letter "y" and cut the stem at a 45 degree angle, to about 9" in length from the fork of the "y." I trimmed the top two pieces of the "y" down to about 6" each. Before I stuck the rose into the soil I removed all the leaves from the "stem" (the bottom part) of the "y." I poked a hole in the dirt with a strong stick and stuck the rose down about 7" into the soil, leaving about 2" of "stem" showing (the stem being the visible part of the plant just underneath the fork of the "y"). When I stuck the rose into the soil, I could feel that it hit the bottom of the pot (probably the rocks). I did not use any root preparation hormones or mixtures. I simply soaked the stem of the cutting in a cup of water for about 15 minutes prior to planting.
I pressed the soil around the rose with my hands and watered it well after potting. It was hot summertime and I sat the pot into the shade underneath the edge of my deck on the ground (this deck was not tall and had 1/2" gaps in between the boards to allow a little bit of sunlight to come through the cracks). It was on the eastern side of the deck and got some sun during the morning because it was at the edge of the porch. However, it was in the shade most of the hottest part of the day. I watered the rose only when the top of the soil looked really dry, probably about 2 - 3 times a month if that. I soaked the soil with water. This remained my routine through the remainder of the summer. A couple of times I used a sugar fertilizer (one tsp of sugar or white karo syrup mixed into a liter soda bottle full of water) during that initial rooting time. I left the rose plant in the shade of my porch for the rest of the summer (probably about 2 months). After that time, the plant began to show signs of greening up and began looking healthy and vibrant. I knew that it had begun to take root.
In the fall of that year when it began to cool off during the daytime, I sat the rose back into the sun at the edge of my porch (again, not the sunny side, but it was able to get daily sunlight). I returned the pot to just underneath the edge of the porch that winter when it began to frost at night. It stayed there all winter. Occasionally I would set the rose in the sun during warmer sunny days, but I always returned it to underneath the porch to prevent it from freezing.
To my surprise in May of the following spring the rose bloomed! It was well rooted by then and was ready to plant in the yard. I gave that rose to my mother-in-law because her "vintage" rose was dying out.
I hope this helps encourage anyone who is wanting to root roses to give it a try. I don't have a green thumb at all. And if I can root a rose, then I know anyone can.
passionforroses101
13 years agolast modified: 9 years agoim late, but anyway, i recently received two roses and i wanted to keep them, so i first put them in a clear vase, and you have to put some sugar in it, and when i saw the buds swelling, i planted them, hope that helps
storan_rocketmail_com
12 years agolast modified: 9 years agoIs there a video that I can watch over the computer to show me exactly how to root long stem roses? Also, I've been reading your tips on how to root them, but does anyone out there have actual pictures of their home grown long stem roses? I would love to see some of them. My email address is storan@rocketmail.com
roseseek
12 years agolast modified: 9 years agoYou can give this a try.
Here is a link that might be useful: Wrapping rose cuttings
judderwocky
12 years agolast modified: 9 years agoi've been rooting fortuniana bushes by just putting them in a mixture of sandy soil and peat in the deep shade. i water them heavily. they lose the leaves, and will just sprout new growth after a while. the trick is getting a long piece of the fortuniana and making sure to get it mostly under the ground... i use the long twiggy/wiry pieces, or the bigger canes, whatever is available... if you use more flexible pieces you can press the cane into the pot in a spiral pattern submerging a larger portion of it. by keeping such a large portion underground it keeps it moist and less likely to dry out. if you can put it in a place up against a wall to protect from the wind that helps. i find that after a while most of them will sprout new growth. i figure i'm just going to plant them in the ground (they grow like weeds here), allow them to establish, and then attempt the graftings...
veeja11
12 years agolast modified: 9 years agoI put all my cuttings in a flat under a blue plastic kids pool
with a round sprinkler on a hose in the middle of it. turn it on for a couple minutes once a day, got 100 per cent successyodiana
12 years agolast modified: 9 years agoroseseek, I tried the "wrapping rose cuttings" for the first time last night with Don Juan and another rose (that I don't know the name of). Will update in two weeks; but won't get my hopes up too high. I'm a newbie and the green-thumb genes in my family never made it to me. :(
Just wondering - has anyone here ever been successful in rooting a Don Juan?
I think I have two Don Juans (I know one of them is a Don Juan for sure) that I neglected for years and is slowly coming back. But would LOVE to be able to have another Don Juan just in case. I'd even buy one if I can find a local reputable grower. Love Don Juans!
roseseek
12 years agolast modified: 9 years agoYodiana, welcome! You know, my feelings about "green thumb genes" are very similar to those about Faith. Everyone is born with the same. It all depends upon how easily we're able to tap into them and utilize them. The first step is to not let any of it overwhelm you. If your first attempts don't work, so what? That doesn't mean you CAN'T do it. It DOES mean you haven't hit upon the appropriate methods for your climate, time, type of plant, etc.
If the wrapping doesn't work for you, test the moisture level of your newspaper first. If it is too wet, too drippy, the cuttings will mold. You will know as soon as you unwrap them. Sometimes, they will turn black and just die or die back. That is NOT necessarily your failing. The wood wasn't of the correct gauge or didn't have enough stored nutrients. That's one of the things I'm testing by continuing to wrap them as warmer weather hits. Dormant cuttings should have more nutrients stored in them than activily growing ones would. Those nutrients should enable them to callus better, form roots better and improve the success rate. Yet, the China rose cuttings I unwrapped recently are showing root tips at the bottoms of the soil balls in the cups.
Bring your Don Juans back to vigor, then start trying them in the wrapping method. It couldn't hurt! LOL! Yes, I believe in supporting the specialty nurseries who have done such wonderful jobs of preserving things which would otherwise have been lost. Yes, honor patents because it's the right thing to do. But, if you have the rose already and it isn't unethical or illegal to reproduce it, make a new one! Preserve your resources. Spend the money you would otherwise have used to replace your Don Juan and buy something unique and interesting, making it worthwhile for the specialty grower to produce it. Usual, commercial roses will continue to be produced. There aren't any patents on them, so the mass producers will continue generating them as long as Home Depot can push them out the door. The old roses, older moderns which very few produce and their like are what we need to support the specialty growers with and encourage them to continue putting out for us.
Please report on your results with the wrapping. Should there be issues with it, I'm sure we can figure out why and point you toward what might fix it. There isn't any reason why anyone who wishes, shouldn't be able to root a rose. Believe it or not, it's also fun to have too many and find good homes for them. Now, who do you know who can't live without a Don Juan...? Kim
cgonzaga
12 years agolast modified: 9 years agoHi, new member here. I have a huge Constance Spry that I have been trying to propagate with no success. I have even tried air layering. Now, I'm trying it with honey as seen on you tube. Are they usually hard to propagate or is it me? Must be me.
roseseek
12 years agolast modified: 9 years agoThere are many variables which must be met properly before you can expect them to form roots. Constance Spry roots fairly easily (as easily as any other rose). It isn't that it is YOU, it IS that you have to experiment with the various methods to figure out which one will work where you are, this time of year with the rose type you're trying to root.
Connie shared her method above and I've posted the link to my rose blog where I detail, complete with photos of "how to" as well as photos of the results, how to use wrapping cuttings to pre callus them to root them more successfully. It's all there for you to mull over. Give them a try. Kim
grandmothers_rose z6b
12 years agolast modified: 9 years agoYES! I just opened a newspaper burrito and ALL the cuttings had callused after two weeks. They are Bella Donna and Rose de Rescht. I feel like someone who just found out she is pregnant. It's always a joy when it happens!
roseseek
12 years agolast modified: 9 years agoCongratulations Grandmothers rose! Now you get to experiment finding the method best for you to hold them while they continue developing. It's likely to require some tweaking to fit your climate and conditions. Good luck and please let us know how you're doing! Thanks! Kim
yolichas
12 years agolast modified: 9 years agoThis spring we followed the directions for rooting rose cuttings: I dipped the cuttings in rooting hormone, put them in the ground and covered each with a trimmed plastic soft drink bottle. They are all doing great, and growing. They are hitting the inside tops of the bottles. What do we do now? Remove the bottles? Leave them on all winter? When do we plant them in their permanent spots? Help!!!
yolichas
12 years agolast modified: 9 years agoI forgot to mention that I live in Michigan. Winters are very cold, and this summer has been a scorcher.

seil zone 6b MI
12 years agolast modified: 9 years agoIf they are out growing the bottles take them off gradually a little longer each day to get them acclimated to the great out doors. Although, I'm in Michigan too and it has been HOT and I can't believe they haven't been cooked already inside those bottles,lol! Can you post pictures of them? If they're good sized already they may be ready to plant. And being planted for the winter would probably be best.
pizzuti
12 years agolast modified: 9 years agoI can't for the life of me get rose cuttings to root. They callus in plain water, fine, and some will even send new shoots of green leaves BELOW the water levevel. Yet transferred into soil the cuttings just ROT... very, very slowly, over a period of 4 weeks it becomes evident that they haven't taken, pull them out... the "callus" is now dead though the stem is living. Either that or the cuttings dry out; it seems like getting the perfect amount of humidity (or perfect amount of light) is like tuning a guitar string. In one case I pulled a "dead" cutting out of the soil and found it had a full little root system that was dead/rotting from the stem even though root tips (now severed by rot) were still alive.
Air layering also hasn't worked for me on roses; a stem that I fed through a flower pot still connected to the plant suddenly became very chlorotic above the pot (the rest of the plant was fine) and there is still no sign of roots after 3 months.
Sometimes I wonder if the more brutal you are with a plant, the better it works; sometimes I yank stems off of plants and stick them in the ground, and end up with a new plant within weeks. I've gotten some perrennial cuttings to root in 90+ degree weather in full sun outside (by wrapping the above-ground stems in paper towels and SoilMoist crystals and hosing the paper towels every couple days.)
Yet roses are supposed to be some of the easiest plants to root and it just doesn't work for me! Am I just trying too hard?
There is normally very dry air here in Colorado... but at the same time this was a really rainy summer and I wonder if all the roses have some low-grade wilt infection from the unusual humidity which springs to life when the stems are in cutting form.
I suppose I could try sticking stems into the ground and letting them freeze that way and seeing if a plant comes up in the spring; given my track record that's as likely to work as any amount of pampering.
kstanford_yahoo_com
12 years agolast modified: 9 years ago"Damaging" the end of the cutting is the only way I've ever seen them callous. I use an old straight razor and the green exterior part of the stem. No cuts equaled zero roots. I've also read about smashing the end with a hammer. I've never gotten thru the stages of rooting with any leaves and they have all died before they were "ready". Are leaves necessary for success? They turn yellow then brown. They drop off and my cuttings eventually rot/dry out. Above I read bury 6in of a 7in cutting. Any comments?
roseseek
12 years agolast modified: 9 years agoKristen, the reason why "damaging" the end of the cutting allows callusing is you're exposing the cambium layer, the juicy, lighter green layer just beneath the bark. This is the circulatory system of the plant and the tissue that differentiates, either forming more cambium to "knit" a bud to a stock or callus which further differentiates to form roots. Scarifying, or exposing more cambium by scraping off the bark to reveal it; smashing or crushing the ends to expose it or simply slicing through the bark to uncover more of it all have the same effect, though with varying results depending upon a variety of factors. The bottom line is, usually, the more cambium you expose, the greater the callus and number of roots.
You might not have had good luck with softer wood cuttings possessing leaves because they transpire too much water, permitting the cutting to dry out. Traditionally, those with foliage work best in more humid conditions where they actually absorb moisture, keeping the cutting hydrated while it calluses and forms roots. Softer wood cuttings with a set or two of leaves are very successful under mist propagation. They continue producing chlorophyll, feeding the plant while absorbing moisture so the cutting continues performing as if it had roots, until it does. Often, this can be accomplished using Mel Hulse's Baggie Method http://paulbardenroses.com/hulse.html It also works rather well under more sophisticated greenhouse conditions. If your climate is humid and mild enough, it may work outdoors without artificial assistance, but I live in a more arid section of Southern California where outdoor propagation isn't successful without assistance.
Are leaves necessary for success? If you're using soft wood cuttings during the normal growing season, and you have the right conditions and equipment, they make success easier, faster and more guaranteed. If you can't meet any of those conditions, they'll probably make it easier to fail. If the cuttings you strike with leaves fail with the foliage drying up, your humidity is too low when and where you're doing it. Where I am, they either perform as you've described, or if I put them under plastic, they mold and the cutting fails. That's why I have been so enthusiastic over the wrapping method. When done under the most appropriate temperatures with sufficiently hardened wood, it works like magic.
Burying all but the top inch of a cutting has very similar effects and results as the wrapping method. You're keeping the cutting dark, cool and moist, all conditions required to stimulate callusing and rooting. After removing them from the wrapping when they are callused, and often rooted, I plant the cuttings deeply so the majority of the wood remains under soil for that exact reason. Why not? The suggested method of planting a bare root rose is to plant it then mound it with soil, keeping it damp, cool and moist until new foliage appears at the cane tops. At that point, you want to gradually expose more and more cane, permitting it to harden off to the elements rather than just stripping the soil from it and letting it fend for itself. The same is true for cuttings removed from a "close environment" of a baggie or greenhouse. They have to acclimate to the hotter, drier and sunnier conditions just as we do after being inside all winter when we begin spending more time in the hotter, sunnier spring and summer.
Once I see growth beginning at the cutting tops, I tilt them out of the pots to check on root activity. If it's filling the bottom of the pot with roots, I'll raise it in the pot, exposing more of the cane by planting it higher, with more soil beneath it. If you can accomplish planting bare roots, uncovering them from the protective soil mounds once grow begins or putting the cuttings out higher just prior to or during a rain, it works excellently! The continual bath of rain helps stabilize them and harden them off very quickly, making your success even more of a sure thing. Kim
hummersteve
9 years agolast modified: 9 years agomgleason
IM sure I will get no reply as this thread is really old. Strange that you should mention coir for rooting. I have been using coir as a worm bin bedding and for plants with a mix. A couple of days ago on a whim I did as you mentioned a clear plastic cup filled with coir with saran wrap covering and wires supporting the wrap like a tent. I have this under a shoplight . I too have a strong feeling about coir for this method of rooting. I have failed so many time before with other ways.
But last summer I did get rose to not only root[only 1] but pop a couple of blooms. This was done running an orbit mister daily in full sun . I had it on a grill so that any success water could drain easily and this was in a fairly loose mix. This plant was kept in my garage but didnt live thru the past winter which was second worse winter for us ever. So Im trying again with some outside and some under shop light.

Bridgett Davis
8 years agoMy sister got some roses from her company and after a few days they are starting to sprout on the side of them their is no roots I don't want to kill them if they are growing was wondering how do I save them from dying.
seil zone 6b MI
8 years agoThere is a chance that you can root them but that growth on the stems isn't a sign that they are growing. Roses store energy in the stems and that's what they are using to produce those leaves.
If you want to try and root them, once the blooms die cut them off just below the flower. At the bottom of the cane use a sharp knife to scrape some of the green bark off exposing the inner white layer. Dip that into some type of rooting hormone and stick it in a clear plastic cup filled with potting soil and with a hole punched into the bottom for drainage, It may take several weeks to see any roots on the sides of the cups. If the stem turns black or dark brown or shrivels up the rose has died off instead of rooting.

gagalzone8
8 years agoLordy, my mind is spinning! I have soaked up so much about rooting roses! Can't wait to try the different ways. I have had success just sticking cuttings in potting soil in the shade, but who can't root Perle or Louis! My youngest daughter is getting married in September, so my budget is NONE for new roses this year! I have only gotten the rose bug in the last several years, and it is driving me crazy! So many gorgeous pictures on these threads....I am green with envy! lol. My only hope is to root my own...now gotta find cuttings!


maidinmontana