


Burrito Method -- aargh
Hay caramba! My cuttings got off to a head start thanks to the burrito method, but once I potted them, not one survived to form roots.
I parked some of the cuttings on the northwest side of my garden shed where the light is bright, but not direct sun. I parked others in my large terrarium which has the same NW exposure.
I took care to avoid over watering. I kept the lid of the terrarium slightly
open for ventilation. On low-humidity days, I misted the cuttings.
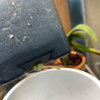
I potted the cuttings in Fafard 52 potting mix, which is a coarse blend of composted pine bark, peat and perlite. I tamped the medium down firmly around the cuttings. I used Dip &Gro on some, but not on all. I buried the cuttings deeply, leaving about a half inch above the surface of the soil. But I had five pots where the cuttings were taller and not buried as deep. The pots in the terrarium sat on a rack that held them off the floor of the box.
In the end, those differences didn't seem to matter very much. Slowly, between early March and mid May, The cuttings turned black. I removed the bad ones each week and until Last week, I thought five pots were going to root. Then on May 11, I checked the pots and even the last few were black.
Thinking about temperature...My potted cuttings were kept outdoors, where temperatures were generally cool at night in March and April. Daytime temps varied more widely, with a few days in the mid 80s, but more often in the 60-70s range.
I took most of the cuttings when I pruned my roses in mid-February. Other cuttings I took from friends' gardens. I was aware of taking cuttings from
older wood.
Mind you, I'm not giving up, but I sure am disappointed. Now I'm just trying to figure out what I should do differently -- a coir planting medium? Brighter light? Cooler temperatures? Rooting powder?
Comments (20)

donaldvancouver
11 years agolast modified: 9 years agoSame. I did about 26 cuttings, ended up with about 20 that had great calluses. They're all turning black as we speak. No idea what I did wrong; will try again next winter. Meanwhile, it's almost softwood cutting season.
grandmothers_rose z6b
11 years agolast modified: 9 years agoYep. Sucks. Been there, done that. Get some Dr. Huey or other rootstock or something with musk rose in its parentage to practice on. It's a real morale booster when *something* grows. At least you know the light available and water and soil combo CAN grow something.
I decided my cuttings had already leafed out and that was the problem. Had your all's cuttings leafed out?
Related Professionals
Fillmore Landscape Architects & Landscape Designers · Fitchburg Landscape Architects & Landscape Designers · Summit Landscape Architects & Landscape Designers · Arlington Landscape Contractors · Aurora Landscape Contractors · Allentown Landscape Contractors · Englewood Landscape Contractors · Hawthorne Landscape Contractors · Middle River Landscape Contractors · Post Falls Landscape Contractors · Stony Brook Landscape Contractors · Irvington Landscape Contractors · Edison Roofing & Gutters · Kissimmee Roofing & Gutters · Thousand Oaks Roofing & Guttershartwood
11 years agolast modified: 9 years agoWhen I read here last year about wrapping cuttings in newspaper, I was really excited. After trying this method on several different batches of roses that usually root readily, I have had to temper my enthusiasm. I have exactly ZERO plants produced after preparing and wrapping hundreds of cuttings. Many of them survived their two week rest in the cool basement, some callusing nicely and a few even putting out tiny roots. None of the cuttings, transitioned successfully from the newspaper to pot stage.
I don't know where the OP lives, but overwintered dormant wood doesn't root very well HERE where we HAVE winter cold and roses go truly dormant most years. The cuttings tend to break bud and try to leaf out without any roots below to support the growth. 'Dormant' cuttings for me are ones taken in late October into early December as the roses begin to shut down for winter ... Gallicas and Hybrid Chinas root very well from cuttings taken at this time.
I am a seasoned propagator, and I produce and repot newly rooted roses every year and successfully grow plants to maturity. For ME, in MY climate, the newspaper method has been a failure. It works in other areas where roses have different weather conditions and a life cycles to contend with ... it's just not the magic bullet that we all thought it would be.
Instead of practicing a method that has failed repeatedly, you can try something new to see if it works for you. I know folks who have great success rooting things in plastic tubs ... for me, that was a recipe for a wide variety of very healthy, happy fungus. Same with baggies. My best way for small-scale propagation is the soda bottle/milk jug method, as taught to me by a dear rose friend. For large scale propagation, I have a mist bench and I use the clear orchid pots that mgleason recommends.
I have four varieties in milk jugs in the basement as we speak ... all of which are still green, so I'm optimistic that they're down there working to produce roots. Fingers crossed.
idixierose
Original Author11 years agolast modified: 9 years agoThank you, Kim! I will definitely keep trying.
Since we get frequent rains, I think I need to find a bright spot in one of our open sheds.
What I call my terrarium is a large clear plastic box with a snap on lid. I keep the lid open a couple of inches for ventilation. But, judging from my results, the atmosphere must have been more humid than I thought.
I have rooted lots of soft wood cuttings in May and October-November. But like you point out, it's good to know several techniques.
donaldvancouver
11 years agolast modified: 9 years agoHello- I too will keep trying. I still have hopes for a couple of the callused cuttings I stuck directly in the ground a couple of weeks ago.
Many thanks to both Hartwood and Roseseek- it's pretty great to get advice from such experienced people. Thanks so much.
roseseek
11 years agolast modified: 9 years agoYou're welcome! Yup, knowing and becoming proficient with as many techniques as possible opens many doors and possibilities for us all!
Notice how your soil choice works, too. Nurseries which produce liners and bands frequently use almost a cactus type mix. Lots of perlite and coarse, fibrous wood material. They have to produce and maintain small plants, held in smaller containers where they are watered very frequently to keep them growing. The wetter the conditions, either from humidity, rain or irrigation, the looser you want the planting soil so there is surface water tension on the planting medium particles without it remaining soggy or muddy. I have much less rain and air moisture much of the year, so my soil has to be heavier, denser, to maintain sufficient water in it to keep the plants growing. But, there also needs to be air movement through the soil as they roots "breathe", too. They take in oxygen and "exhale" carbon dioxide, just as the leaves do. If the mix is too dense and remains too wet, too long, the callus will rot taking the stem with it. Loosen that soil a bit with sand or perlite, never vermiculite as that breaks down into clay, and you might find better results until there is enough root growth to plant them in regular potting soil.
If you planted other seedlings or plants in that soil and held them in the same conditions, would they grow, or rot? That should be a good guide for you to use to determine if the soil you're using is light enough or too heavy. If you've received bands from Sequoia, EuroDesert or Burlington, you should notice how much perlite is in the soil and how airy, loose and light it is. Vintage has often used what appears to be nearly a red pumice stone which holds water on its surface like perlite does, but drains very fast. They propagate under plastic not so much to retain the moisture in their wetter environment, but to increase the heat to stimulate rooting and growth. EuroDesert had to use mist under plastic because of the wind and aridity of that desert environment. Sequoia did similarly as does Burlington, because it gets windy and quite dry sometimes and they have to water frequently. If you are propagating where they receive sufficient rain at sufficient intervals and have relatively high humidity, you probably have very similar conditions (other than possibly the heat factor) as these nurseries did and do. Your soil may be staying too wet causing them to rot instead of rooting. Covering them exacerbates the too-wet condition, preventing the excess from evaporating and encouraging rotting. The cuttings I lost fastest and most easily this year were those planted in Super Soil instead of the moisture control soil. That stuff stayed muddy, soggy and grew fungus gnats like crazy. Those gnats eat fungus, which grows in water logged, compacted, nitrogen deficient soil, so Super Soil turned out to be far too heavy and moisture retentive for my conditions this year. It would have been far worse had we received the additional seven inches of rain we came up short!
Also, think of it as a home version of striking root stocks in commercial production. The cuttings are struck in the open ground with no cover, by the hundreds of thousands, perhaps still in the millions, by many growers. The Fortuniana in Australia is pre callused through wrapping, then shoved into the soil without cover. Wasco, CA, where the California fields are has pretty nasty weather. The rainfall is much less than what many of us receive. It gets COLD and very HOT as well as very windy and arid, yet millions of stems of Huey are simply stuck in the ground to root every year. The statistics are probably a bit less now than when reported on Wikipedia, but this is what that site says.
One of Wasco's major economic activities is its agriculture, specifically the growing of roses. 55% of all roses grown in the United States are grown in or around Wasco.
Bestplaces.net says this about the climate. The first number is Wasco, the second is the average for the rest of the US. You can find yours by going to the site and entering where you are.
Climate Wasco, CA United States
Rainfall (in.) 6.8 36.5
Snowfall (in.) 0.1 25
Precipitation Days 36 100
Sunny Days 276 205
Avg. July High 99 86.5
Avg. Jan. Low 35.8 20.5
Comfort Index (higher=better) 51 44
UV Index 5.6 4.3
Elevation ft. 335 1,060Hard wood cuttings of root stocks are pushed into the ground there by the millions, without cover and flooded to irrigate them. Perhaps some may use rainbirds to overhead irrigate, but they root in mass in the open ground without cover in a very low humidity, low rainfall area in a sandy type soil. This should also help give you the idea of what type of conditions could work best for you where you are using this type of propagation method.
Here is a link that might be useful: Wasco, CA climate
grandmothers_rose z6b
11 years agolast modified: 9 years agoHumm. Black stem equals rot. Sure had plenty of that. Sounds like I need to ditch the Miracle Grow mixed with additional perlite and go to spagnum and perlite only. (I eventually take good advice.) Maybe make sure the cups are off the sidewalk and draining well, too.
The few that rooted were in a spagnum and perlite mixture, in addition to having a musk rose heritage.
And . . . she's off again! Chasing the elusive rooted cutting . . .
roseseek
11 years agolast modified: 9 years agoIf you're talking "Hybrid Musk" rose heritage, you really mean hybrid MULTIFLORA heritage as there is a ton more definite multiflora background than the supposed, presumed "musk". And, multiflora roots like the weed it is. Kim

caflowerluver
11 years agolast modified: 9 years agoI am finally starting to get some roots on my Oranges 'n Lemons cuttings that I started with the burrito method. I started them in newspaper April 1st. It took almost 3 weeks before they started showing callouses. I planted them April 24th. I just checked them and finally some of them have roots but not many. The other 5 roses' cuttings that I started at the same time, don't have any roots.
I have them in the garage with indirect light. We are still getting temperatures down in the 40/50's at night. I have them covered with a plastic bag (don't have any soda bottles - we don't drink the stuff). I haven't misted them or added any water since I planted them and they are still green, not dried out or black. Some are putting out leaves but no roots.
I have always had mixed success with rooting roses and I have tried all the methods for the last 20 years. Each time it is a learning experience. I am on the Central Coast of CA. Cool foggy weather in summer and usually very wet winters when we get all our rain.
ClareHere is a link that might be useful: My rooting results from the burrito method.
roseseek
11 years agolast modified: 9 years agoClare, I would suggest you shouldn't have them in the garage or under lights, but outside where they will receive at least morning sun. I am in Encino, zone 10a, very dry and hot in comparison to where you are. There is seldom NOT hot, brilliant sun. I grow my cuttings on the east side of the house in a walled garden where they don't get all day sun and nothing disturbs them. Some don't work there, but most grow like crazy, form roots and begin flowering rather quickly.
The issues in your climate would be lack of heat, reduced sun and too much water/humidity. I would think by putting the cuttings out where they will receive as much morning sun (but not the hotter, afternoon, if possible) as they can, without cover, your success would improve. I don't know whether the ones you have going now, particularly those with leaves, would work because they are soft, being used to the indoor, artificial light conditions. Putting them out where it's hotter, brighter and more severe in comparison would be like taking greenhouse grown plants outside for the first time and you know how those burn quickly.
If I were doing it where you are, I'd use a light soil, like a seed starter mix, plant the callused cuttings deeply in the pots and put them in as much morning sun (when there IS morning sun) as possible and let them do their thing. Lighter soil can handle more dew, fog and rain. Your humidity, dews and fogs are going to keep them well hydrated. The solar heating, even on foggier days, will stimulate them to develop into plants. Any sunlight they receive will enable them to photosynthesize chlorophyll, feeding themselves so they develop faster. And, you won't have to harden them off to move them outside because the new growth will have grown in the more extreme conditions.
As I pointed out above, if root stock cuttings will root outside without cover in Wasco, they should root by themselves when dropped on the ground where you are. I had that issue with apple tree prunings in a nursery in Pacific Palisades where they fell into the fifteen gallon cans and rooted like weeds. That was within one block of the beach on Sunset Blvd. where it is perma fog and people grow slime mold for turf!
If you try it again when you have the right weather and material, put them outdoors right off and see what they do. Kim
caflowerluver
11 years agolast modified: 9 years agoKim - Thanks for the advice. I do have them under a big window that lets in morning (east) light half the day. I kept them in the garage because the sun can be intense when we do have sun and I have burned plants and dried out cuttings in the past. Pretty soon it will be June Gloom here. Then I can put them out all day long and not worry about sun burn. LOL.
And in the garage they are protected. I live on 2.5 acres way up in the mountains and have to worry about critters getting any tender young plant. My place looks like a prison with all the wire fence over everything. The raccoons are the worse.
Also I have them in seed starting mix with the cutting pushed all the way to the bottom of the white styrofoam cup.
Claregrandmothers_rose z6b
11 years agolast modified: 9 years agoI'll take a hybrid anything at this point that roots. I may be desperate enough for success this summer that I hunt up some multiflora, take cuttings and plop 'em in the potting soil just to say I grew a rose!
roseseek
11 years agolast modified: 9 years agoI can understand the critters issue, Clare! That's why mine are in the front walled garden where there is far more disease due to the limited air flow and higher humidity. If there is any way to tuck them under a bush and keep the vermin out of them, they will perform a lot better getting the damper air and greater light levels. The air in the garage can still be quite a bit drier than outdoors, but you know what works best where you are.
No, don't bring multiflora in your yard if you don't already have it! At least, not the plain old multiflora. That is the host plant for Rose Rosette Virus and you don't need that stuff around! Hack off a piece of Dr. Huey root stock sucker. With that stuff, dead leaves root in fire! LOL! Kim
grandmothers_rose z6b
11 years agolast modified: 9 years agoOooh, that's why Dr. Huey rooted, the conditions were perfect for him! :)
This morning I went back to the original plant I *thought* was Oklahoma (turned out to be Dr. H) to get some more cuttings, and Dr. H was the only thing growing. My friend assured me that last year she got some blooms of Oklahoma off the plant. Nothing but large blooming canes of Dr. H now. I don't grow grafted roses and didn't know rootstock could take over like that.
caflowerluver
11 years agolast modified: 9 years agoGood old Dr. Huey! I have had that happen many times. I have 2 that keep coming up from old roots. I had moved the old HT roses and must have left some roots behind. I think I will move them to grow up on the deer fence. Don't care if the deer eat them. LOL. They are kind of pretty when in full bloom.
Claregrandmothers_rose z6b
11 years agolast modified: 9 years agoI agree, I like the blooms. Here he gets lots of blackspot, as I notice as I drive around scoping out the healthy roses along my path.
Today I asked a total stranger for cuttings of a red rose that was a blooming fool with nice healthy foliage. Her other 4 roses were dogs, so I know this one didn't get special treatment. The cuttings are wrapped in damp newspaper in a baggie in my fridge. I'm going to plant them tomorrow. Gonna use the spaghnum and perlite soil mix in the styro cups without a plastic cover and see what happens. Gonna use Dip N Grow, score the ends, keep two leaves on the stems. We had over an inch of rain on Tuesday, so the parent roses are well hydrated, too. We'll see.
overdrive
11 years agolast modified: 9 years agoLots of cuttings experiments went on this year, with lots of failures, and also success, so very much was learned:
#1 - medium is very important. I started off with sterile medium, such as perlite/peat, or perlite/peat/ground bark treated with copper ammonium, or perlite/peat/vermicultite, and I got lots of failures. Wet medium = guaranteed disaster.
But even damp medium, even if it starts out sterile, will eventually overgrow with fungus = disaster all over again.So: what is learned? Sterile medium is not the answer. I used google search, and discovered that leaf compost, and worm casting compost are "non-permissive" for fungal growth.
So now I learned that the medium should be rich in beneficial bacteria, which are "non-permissive" for damping off fungi, and so I used a new medium: one part leaf compost + one part compost enriched with worm casting (bought at garden centre) + one part ground up bark + one part peat. This was barely moistened, and as an objective measure I also weighed the peat pot with medium on the kitchen gram scale (260g for a 3.5" peat pot).
I use the Malcolm Manners method, with the tray covered with a plastic dome, so there is always 100% humidity. The latest batch of cuttings developed some black spot, so I have been regularly misting the leaves with daconil/rose pride.
Preliminary results at 12 days: absolutely NO mold on the medium, and I dug up one cutting, and the stem is totally clean of fungus, PLUS!!! - that stem already put out two hair like feeder roots.
I was very cautious to keep my temperature at 70 - 72 degrees, and the lighting is just indoor fluorescent.
Some of my cuttings are prepared by burying the stem horizontally, so it is like a burrito, but using compost/bark/peat instead of newspaper - really a leaf-bud method, but I used as large a stem as would fit, and often had 2 buds with one leaf. I call this an "advanced burrito modification", although some purists will object that the burrito is only hardwood, but I see people using semi-ripe cuttings and still calling it burrito. Half my cuttings are done in the conventional manner, and the other half I did modified-burrito style.
I will take some pictures, because I think I have finally discovered what works, and how to beat the fungus with organic means. hopefully i will be able to start a new thread on this, but I will need to wait another 10- 12 days to see if the other cuttings develop shoots.
Conclusion: sterile medium = hit and miss, cannot trust it.
compost medium, with beneficial bacteria = "non-permissive" for damping off, and also contains nutrients so as soon as roots are growing the plant has nutrition available.best regards, klinko16
try looking up allison jack, cornell
http://organic.unl.edu/research/ncstate_08_jack.pdfroseseek
11 years agolast modified: 9 years agoCongratulations Klinko! Fortunately, planting the pre callused cuttings in potting soil outdoors during my rainy season doesn't support fungal issues in my climate. Here, putting anything under any kind of cover, no matter what time of year nor what medium, will mold and rot unless sprayed with the fungicides you mentioned. I'm glad you've hit on a method which appears to permit you success! Kim
greenthumbz76
9 years agolast modified: 9 years agoAt first I tried many methods including the burrito method which all ended up with the black stems. I began my experiment with store bought roses purchased at the local flower shop. I've had awesome success with other hardwood cuttings with Dip n' Grow, so I figured it would work with roses. I proceeded to look up methods online, I followed the instructions in the Dip n' Grow insert with all of them resulting in black stems. One thing I did notice was that with one experimental method using water with an air stone bubbling (oxygenating) the water the stems would begin to callous and they began to show new growth at the budding sites, but after a while the stems would turn black and die. At that point I'd tried different pH's, nutrient solutions and growing mediums.
After several dozens of roses and a lot of wasted money on roses, I eventually got fed up. So on my last attempt I realized that the blackness on the stems was actually an infection of the stem. So I thought to myself "How can I eliminate the infection factor?".
I tried one more totally experimental method using and uninfected portion of the main stem that exhibited new growth from one of the stems that was infected in the lower area and finally, SUCCESS!!Here is my original method that I used to propagate the first plant:
You will need the following:
1. Coir (coco peat)
2. Microwave safe bowl
3. Microwave Oven
4 Clear Container with a lid, (many Chinese restaurants use them for soups)
5. Dip n' Grow Rooting hormone
6. Cotton swabsStep 1:
Add your Coir to the microwavable bowl
add enough water to have the coir in a liquefied state
Microwave for 20 minutes to sterilize the Coir and kill any fungal spores or bacteria it may have in it.Step 2:
Strain the Coir using a piece of cheesecloth or other fabric that has been washed in chlorine bleach being certain to squeeze as much of the water out as possible.Step 3:
Wash the soup container with bleach then thoroughly rinse. Fill soup container half way with your damp coir packing it down.Step 4:
Take a cotton swab and dip it into pure Dip n' Grow then dip your swab in water as to slightly dilute the Dip n' Grow in the swab.
and use the swab to cover the areas of the cutting where it has been cut, being careful not to put the rooting hormone on any part of the cutting that will be exposed to light.Step 5:
Put the Hormone treated area into the coir being sure it is not exposed to light, then cap the container.Step 6
Put your cutting under some form of artificial light, compact fluorescent bulbs work well (at least 25 Watts).In the above steps you've created a sterile environment for your cutting to take root.
In about a week or two check for callusing, when you see the callousing then add a small amount(a few drops) of very mild, high phosphorus fertilizer (promotes root growth) around the area where the callousing exists, so it can easily gain access to the fertilizer .
Look at the bottom of the container periodically for signs of rooting In another 1-2 weeks you should see roots growing against the bottom of the container. This is the point where you can gradually expose the leaves to the environment because once root formation has begun you no longer have to fear infection
Note: if you notice any fungus growing anywhere in the container, it is better to expose the cutting to dry air which will kill the fungus and let the cutting have chance at growth.

roseseek