


Anyone have this composter?
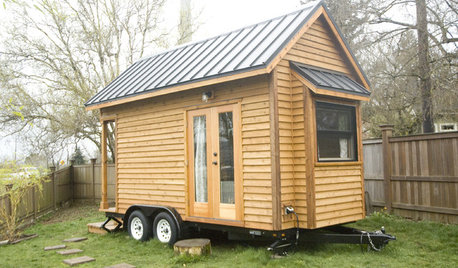
I am new to gardening and, after spending a ridiculous amount of money on good compost, I have decided to start composting. I purchased the following composter today: http://www.compostbins.com/compost-bins/compost-bins/aerobin400insulatedcomposter.cfm Does anyone here have any experience with this particular model? I have a huge yard with lots of leaves/clippings. Any advice for a complete newbie to composting? I have been googling and reading up but it gets soo confusing bc there are so many kinds of composters out there. Hopefully it gets easier as I go along :) Thanks for any advice-even of its to tell me I bought a lemon!!
Comments (29)

behlgarden
12 years agolast modified: 9 years agoI am yet to start composting myself, but from my limited knowledge of compost bins, the one you really should own is a tumbler that you can turn/roll. The one you bought you wont be able to move the composting materials around. For the amount of money you spent, you could get decent tumbling compost maker. I really want to buy that Mantis twin composter but its damn expensive $599. If it hits 50% Off I will buy it.
Again, I cant really speak for composters as I don't have personal experience with them, just general reading knowledge.
Related Professionals
Cary Landscape Architects & Landscape Designers · River Forest Landscape Architects & Landscape Designers · Anderson Landscape Contractors · Goodyear Landscape Contractors · Bedford Landscape Contractors · Del Aire Landscape Contractors · Gloucester Landscape Contractors · Oak Forest Landscape Contractors · York Landscape Contractors · Palos Hills Landscape Contractors · Shenandoah Landscape Contractors · Dorchester Center Decks, Patios & Outdoor Enclosures · Greeley Decks, Patios & Outdoor Enclosures · Jupiter Decks, Patios & Outdoor Enclosures · Springfield Decks, Patios & Outdoor Enclosuresdarth_weeder
12 years agolast modified: 9 years agowhat's interesting is all the glowing reviews from people who haven't created finished compost with it yet.
Like telling your Mom that you're gonna marry the girl you just went on a blind date with.
greenhavenrdgarden
Original Author12 years agolast modified: 9 years agoThanks for the responses. I did notice the reviews myself and I just ignored them since none of them had actually finished composting. I liked that it was insulated and that I wouldn't have to do work (turning). Hopefully someone else actually has this one and can chime in. Thanks again :)
ZoysiaSod
12 years agolast modified: 9 years agoPretty neat-looking composter. Nifty that it has "double wall styrofoam insulation so it works in the cold"
I wonder how well it composts in 5* F weather?
When you get that composter, please tell us how that inner lung works:
"Patented inner 'lung' to promote aerobic breakdown"
To provide more oxygen than the lung can probably muster, you might be able to use that composter as a tumbler, if you set it on its side, and turn it like a cylinder slowly. Or you might choose, instead, to stick a crowbar, shovel, pitchfork, or some other tool in the chamber to fluff up the inner materials. The more oxygen the aerobic bacteria get, the faster they can break down the carbon.
If you're not in a hurry to get finished compost, maybe that "Patented inner 'lung'" is all you need.
ZoysiaSod
12 years agolast modified: 9 years agoBehlgarden wrote:
> I really want to buy that Mantis twin composter but its damn expensive $599. If it hits 50% Off I will buy it.I've only been composting for 2 weeks, so I'm not an expert, but I don't understand the attraction to the Mantis and other composters in the $300 to $500 range.
All you need is a big round plastic barrel or even just use a trash can. If you don't want to drill holes in it for air, just leave the lid off. That's what I've been doing.
To tumble the material collected, I just set the barrel on its side, and roll it on the ground a couple times. (Lots of other folks do the same thing.) Instant tumbling achieved [chuckle] :-)
greenhavenrdgarden
Original Author12 years agolast modified: 9 years agoWell I'll certainly come back and let you know how it works. If it does end up being a FAIL then I guess I'll just use it to hold the enormous amounts of leaves and clippings we have in our yard and I will buy a tumbler for smaller batches and kitchen scaps. I kind of like the last idea of the garbage can!
I have made ALOT of expensive mistakes in my gardening journey. Last spring, I removed the top 10 inches of soil in a large section of garden and then replaced it with bought top soil. I did 150 bags of soil before learning I could order in bulk. Then I bought 3 yards. After it was all replaced I had to admit that my native soil is actually REALLY nice. The bought stuff was ok at best!! Now to take out weeds I am smothering with card board instead. Lesson learned the hard way!!! Thank goodness this is fun bc I am laughing at my mistakes rather than crying-lol :)toxcrusadr
12 years agolast modified: 9 years agoNot to get off on a tangent but with rare exceptions it's better to improve the topsoil you have with amendments rather than replacing it. But most of us learned something like that the hard way too. :-]
If you have "a lot" of yard waste you may find one compost bin isn't enough, and from there it's a short ride to cheap or free pallet bins or just 'pile it up and let it rot'.
We'll be interested to hear how this works out for you!
ZoysiaSod
12 years agolast modified: 9 years agoThis web page might be useful to you:
How to Make a Trash Can Composter:
http://organicgardening.about.com/od/compost/a/cancomposter.htm
Just make sure you can get at least 3.5 cubic feet of leaves and grass in the trash can, because that's the minimum volume of material required to properly maintain the temperatures needed for hot composting. Better yet, 5 or 6 cubic feet.
That shouldn't be hard. A medium sized trash can will easily hold 3.5 cubic feet.
The author of that web page I linked to above is a little sketchy on the ratio of carbon to nitrogen needed--in other words the ratio of browns (leaves) to greens (grass clippings) needed for composting. A ratio of carbon to nitrogen of about 28 to 1 is ideal and that can be reached by adding about 2 inches of chopped leaves to every 1 inch of grass clippings. If the leaves aren't chopped, you may have to increase the ratio to 3 inches of leaves for every 1 inch of grass. Just layer it like lasagna, then mix everything up after every couple layers or so.
I hope this isn't getting too long-winded. Being a compost newbie myself, I'm writing this stuff down for my own benefit as much as others. Reviewing helps me better remember :-)
If you have a string trimmer, you can easily chop up the leaves after the leaves are placed into the can. Chopping up the leaves helps speed up the composting. Or you can use a leaf blower/vacuum to vacuum and chop the leaves in one step.
Some leaf blowers allow you to set them in reverse, becoming leaf vacuums that chop/mulch the leaves.
This web page might be helpful too:
http://supercompostingtips.com/making-leaf-mulchleaf-mold/#more-725
Tumble the trash can once or twice a week by setting it on its side with the lid on, and rolling it a few times. The simple act of tumbling introduces a lot of oxygen into the pile which the bacteria need to munch on the leaves.
Tumblers can produce compost in as little as 2 weeks to a month or so. The more static bins that you don't tumble (or fluff much with a pitchfork/crowbar) will take longer, maybe 6 months to a year or more.
The bacteria use the nitrogen in the grass to make the amino acids to make the proteins which comprise the enzymes the bacteria use to break down the carbon in the leaves, producing compost--voila! (The digestive enzymes break down the carbon in the leaves.)
Wet down the material with water when you add it to the can. You want the stuff to be moist but not soggy. The bacteria use the water too, but too much water will be counter-productive.
If you want to be really good at composting, get a composting thermometer or even just an oven thermometer. I got a nifty digital oven thermometer from Walmart for $15.
When the temperature in the center of your trash can tumbler falls below 104* F, that's the time to tumble the can again to introduce more oxygen. You could also just tumble it once or twice a week if you don't want to use a thermometer. Or even tumble once every 2 weeks if you don't want to tumble it much.Good luck. It might sound complicated, but it's not, and composting is fun. You'll get the swing of it after just the first time.
ZoysiaSod
12 years agolast modified: 9 years agoI just saw ToxCrusader's post. Take his advice to heart, because after reading his past posts, I can tell you that he knows about five-thousand times more about composting and gardening than I do.
toxcrusadr
12 years agolast modified: 9 years agoAw shucks. :-]
Regardless of that Zoy, everything you posted is quite right as far as I know. Everyone has to try out different things for themselves to see what works for them.
robertz6
12 years agolast modified: 9 years agoHow to make a $25 Compost bin.
Go to a good hardware store. (One that cuts stuff for customers, not one that makes you buy a roll of whatever size they have in stock. If you don't know where a good one is located, ask the neighbors, someone knows.
Get 13 feet of 1/4" hardware cloth, 24,30 or 36" high. Cost me $15 last time I went. Attach the ends with wire, or pieces of a spare coathanger. If you want a larger bin, buy enough for a 4'x8' size bin.
Comparison of my simple mesh bin with my compost tumbler:
Cost: $15 vs $350
Time Assembly: 5min vs 3 hours
Holds: 25 cubic feet vs whatever the other one was
My back: Mesh bin was easier
Better winter: Mesh bin held heat much better
Appearance: Varies, I felt the mesh bin blended into the
yard better than a green object with rustbehlgarden
12 years agolast modified: 9 years agoThe only reason I mentioned Mantis was that they claim that their composter gives out finish compost in about 2-3 months, it has twin bins, and I read a lot of reviews of end users swearing by it. Cost actually is $499 but I saw an old deal where it was offered at 50% off.
On the mesh option someone suggested, what do you do about smell? I live in neighborhood that has track homes.
ZoysiaSod
12 years agolast modified: 9 years agoBehlgarden wrote:
> On the mesh option someone suggested, what do you do about smell? I live in neighborhood that has track homes.Well, if the compost smells bad in a mesh, open bin, it will probably smell badly in a closed tumbler too (the tumbler won't give you much relief in that regard, I don't think).
If you get the ratio of browns to greens right, the compost shouldn't smell, or not smell much. It's the nitrogen in the greens/grass that produces the ammonia-like oder.
So if there's a bad smell, it might mean you'll need to add more browns/carbon/leaves to get an approximate 28:1 ratio.
The compost might also smell if it's too wet. If you have too much water in there, the pile might go anaerobic (instead of aerobic) until you tumble it or pitchfork-mix it to get enough oxygen in there to offset the excess water. Some water is necessary for composting to work, but too much isn't good. You want things moist but not soggy.
ZoysiaSod
12 years agolast modified: 9 years agoI just read some reviews of your soon-to-arrive Aerobin 400 at Amazon. Not glowing, I'm sorry to say--particularly the review written by "Primula."
Here's the link:
http://www.amazon.com/Exaco-Trading-Aerobin-400-Insulated/dp/B0036S643A/ref=zg_bs_3753631_26However, folks on Amazon seem to rave about the Envirocycle tumbler, and it's half the price:
http://www.amazon.com/Exaco-Trading-Aerobin-400-Insulated/dp/B0036S643A/ref=zg_bs_3753631_26
Here's an interesting metal pen composter on Amazon, and the price is very right:
http://www.amazon.com/AM-Leonard-E-Z-Compost-Bin/dp/B0007LSBG2/ref=zg_bs_3753631_44
I also saw some interesting composters a couple days ago in ad banners on GardenWeb.
I'm going to stick to making my own composters, though. This morning, I learned that my large, 9 cubic foot plastic barrel composter spins *really* fast when I placed it on an upside-down furniture-moving dolly.
These dollies are $20 at Home Depot and are simply 4 wooden planks fastened together with bolts to form a rectangle that's 2.5 feet by 1.5 feet. At each of the 4 corners of the rectangle is attached a small castor wheel.
Set this furniture-moving dolly on the ground, and turn it upside-down so the 4 wheels are facing upwards. Then just lay your plastic barrel side-ways on the 4 wheels, and you can spin that barrel super fast on those wheels! Instant tumbler. Works great.
ralleia
12 years agolast modified: 9 years agoOh my goodness! PLEASE don't pay hundreds of dollars for a composter.
I really like Robert's idea of a mesh composter. All my currently successful "composters" are along this line, using welded wire garden fence to contain materials to be composted. And at the root, that is all you need to make compost. Something to CONTAIN the contents, while allowing air and preventing excess water from overwetting the compost or washing out valuable nutrients.
My favorite one is simply a long piece of 6-foot tall welded wire fencing. Any time there is a big stump on the property that I want gone, I build an enormous compost operation on top of it. It's not as fast as a stump grinder, but it is far more economical!
The 1/4" hardware cloth is good since it will contain leaves and paper (if you compost paper, too) better than wider mesh products will.
For the big compost heaps, we often also insert lengths of wide PVC pipe drilled with ~1/2 inch or larger holes to help carry oxygen to the center of the piles. They can be used for years.
If you are composting primarily leaves, there won't be any discernible smell. The only time my compost gets any odor at all is when I get loads of grass clippings from somewhere and they were sitting around in a dense pile. Grass clippings have to be used sparingly and spread out a bit through the dry leaves, and then they are fine, too.
If you want something more sightly, then you can try apremade mesh composter
I use a couple of these, too. My only criticism is that the mesh spacing is a bit wide (though stuff doesn't blow away much once it settles) and that they should include a cover. But a small tarp will work.
Or if you want to go all out then start a worm composting operation in the basement!
{{gwi:260141}}Here is a link that might be useful: Can o' Worms
ZoysiaSod
12 years agolast modified: 9 years agoAccording to Stu Campbell, author of "Let It Rot," what Ralleia is describing in her very helpful manner is a close variation on the Indore method of composting, first set to paper in the first half of the 20th Century by Sir Albert Howard who worked for a time in Indore, India. The Indore method places the nitrogen-rich items and carbon-rich items in alternating layers, and lets them stew for 6 weeks before aerating/turning the pile. You don't have to wait a full 6 weeks, though--there are many methods and variations on the methods, all of which work and have their own advantages and disadvantages.
The method I described above is a faster but more labor-intensive method of composting, and it's called the University of California method. In this method, you chop up or shred the nitrogen-rich and cabron-rich materials into smaller pieces, and mix them thoroughly instead of just layering them. You also aerate the whole heap by turning it much more often, at least every 3 days (or even every day, or, I guess, even just once every 7 days--whatever you like). This method can make compost in as little as 2 weeks, but the disadvantage is it's more labor-intensive, (unless you have a scarab or composting-turning machine).
The Indore method also sets the pile on the ground. If the pile is raised a little bit off the ground, this will be advantageous in that air can flow better through the pile, stoking the bacteria. Like us, the beneficial bacteria need air to breathe to do their work. As Lowenfels and Lewis write in "Teaming With Microbes,":
"A single ring of fencing or chicken wire, three feet in diameter and four or five feet high works great. Using a wooden pallet or screen supported on concrete blocks at the bottom of the pile will allow air to circulate into the pile, making it much less work to maintain.
I like this part about "much less work to maintain."
Lowenfels and Lewis also throw a shout-out to tumblers, I'm happy to say, since that's the method I'm using right now, although I'm going to start a ring soon too. They write:
"Some composters swear by revolving bins for making compost: in go the organic materials and to aerate all you do is spin the drum a few times. Once you figure out how to keep the materials in the bin from getting too moist (a chronic problem with enclosed systems), these can be very effective. Again, you will need to experiment to suit your tastes and needs."
The tumblers incorporate the thorough blending and frequent turning of the University of California method. Chopping or shredding the materials before adding them to the tumbler will hasten thing along too.
bi11me
12 years agolast modified: 9 years agoFor a variety of reasons, many of them already elaborated here, I'm not a fan of these types of products. The OP states
"I have a huge yard with lots of leaves/clippings."
I don't know their definition of a huge yard but for me I could mow or rake just a portion of mine and stuff that bin to the point where another banana peel wouldn't fit. After almost 3 decades, I compost in windrows and pallet bins. In more urban areas that may not be an option, there may be aesthetic reasons why a big plastic box in the back-yard would be considered preferable, but not in my system. The issue of speedy production is raised, but that depends on some kind of activity on the part of the gardener, one has to make the effort to turn or tumble or do whatever it takes for the "lung" to be activated.
It seems clear to me that the OP is not limited in regard to financial resources, but is looking for a fast way to improve the garden soil in the existing beds without an enormous amount of labor and in a limited amount of time - hence the attempt to "improve" the soil by buying it in huge quantities. To me, the best approach would be to at some point call an end to the gardening season, collect all of the OM from the yard, pile it on the garden area, shred it with a mower, and then till it into the garden. The next season will see an enormous improvement in both tilth and fertility, and then the composting process will be able to keep up with the needs of the garden and the production of waste of the household, though it is unlikely to be able to deal with the organic matter from the yard. Single bin composting systems have another drawback, in that they are constantly being added to. This means that the state of decomposition is always variable - for those in need of a steady and generous supply, a very inefficient method. If the OP is looking for a way to manage common household foodscraps, and fertility is of secondary importance, then these commercial composters may be an appropriate choice, but for a garden and property of any real size, a system of bins is a much more effective approach.
For a property of any appreciable size, say 2 acres or more, I would create a series of 6 or more pallet bins, located near the garden. I would fill them sequentially, ideally with a chopped blend of greens and browns, and do so on a 2 or 3 week basis. These bins will produce useable compost in about 3 months with almost no labor other than that required to fill them. If the gardener chooses to turn them, the results are faster. With multiple bins, you have compost available in a constant stream... eventually, every month a bin will be ready to empty, and the cycle begins anew. To my thinking, the money spent on commercial composters would better be spent having a farmer come out with his tractor and do a bit of tilling.

Laurel Zito
12 years agolast modified: 9 years agoI saw your bin today and it looks like winner. It appeared in a banner ad. The only thing I can tell you is try to allow the liquid to drain away into the ground because it is leachates and not liquid fertilizer. When I clicked on the add I noticed that claim. I like a bin with no bottom for easy draining into the ground. Although depending on your climate that one may work for you.
Compost needs to be well drained. If you add starbucks coffee grounds those are so wet, that no extra water should be added. One mistake people make is to turn the hose on the compost and water it like a plant. Once it is too wet you will notice a smell as it becomes anaerobic. Bins with bottoms and tumblers are prone to this problem. So, then you need to dry it out. Take it all out and dry it in the sun but that is bad for flies coming to compost and laying eggs. This is the problem with cheap homemade wire bins. They attract rats and flies. There is no easy way to remove water. It is better to over water the compost in the first place. I would mix or turn maybe once a month. It depends on how you feel. You will develop your own system as you go along.
greenhavenrdgarden
Original Author12 years agolast modified: 9 years agoThank you all for the responses. The bin has arrived. It was shipped quickly, nothing but good things to say about the site I ordered from. The bin itself is strong. I like that it is sealed (keeps the critters out). It was easy to put together-just snaps together. It will also be easy to take apart and hose down should I feel it needs a good cleaning.
The only real 'negative' (besides the price according to some posters)is that it is not a bin made for stirring-at all! After reading some posts I thought that I would speed up the prossess by stirring but it is just not easily done. I will have to use this bin exactly as it was described so I can't say for sure how good the compost will be bc it isn't done yet.
It is thick walled or 'insulated' as it was described and the 'lung' reminds me of the home-made bins with a pipe running through them with holes punched in. The 'lung' is better done though and I think the design will stop it from clogging and help the air circulate better.
All in all, I dont regret the purchase but I do now realise I could have gotten compost made quicker and cheaper. I will keep this and use it for my food scraps bc wildlife can not get in. I live at the edge of a very large wooded area with LOTS of wild life but I am also in a good size residential town....basically the animals all enter and exit through my property as they search the neighborhood for treats now that we have taken over so much of their land. I have small children so keeping animals away from my compost area is crucial for me.
I do have ALOT of leaves and grass. This bin is as tall as my shoulders and I could fill it a dozen times easily and still have leaves left over for mulching. I think I will take advantage of all the good advice offered here and come up with another bin for quicker batches. I am also going to get some wire bins for holding the extra leaves. Up until now we have the town take them away for us but it is silly to waste like that! I have seen plans on the internet for building a 3 bin system with wire and a lid. I am going to see if I can find a local builder who will build it for me (anyone know of someone in Fairfield County, CT let me know!).
Thanks to the poster who said not to use the 'liquid fertilizer'. I figured something was off with that when I poured in some liquid coffee while dumping in scraps and it came out as--liquid coffee--through the spout a few hours later.If nothing else I figure it does drain well for a closed bottom bin-lol.
Finally, I have a question: Being that this bin is closed on the bottom, worms can not get in (obviously). I thought worms were very important for composting? Can I add worms from the top or is that just a complete waste of time?
Again, thank you all for the help. I am sure I will use the advice bc this will not be my 'only' bin that I use!!
LauraLaurel Zito
12 years agolast modified: 9 years agoYou don't really need to have worms for composting. I have never used a closed bin system, so I have never tried it, but worms are not mandatory. Thank you for any information about that bin, because I have considered and it looks like a hoot. I could have a lot of fun trying it out. But, I am afraid of close bin system. I almost got that one until I found out it was closed bin. Do you have any bears? I read if you live in the woods and have bears they will destroy your bin. If I did I would keep my bin in the basement. Seriously, it is too expensive to be ruined by bear claws. That bin is like the luxury car of all bins in my eyes. I hope it last a long time and does not crack early. If had a basement that I could enter the garden from the basement, I would just carry the compost out when done. But, I would have to bring it a long way to in my current home. Having the bin protected from the elements should make it last much longer then an bin kept outside. The cracking of a plastic bin results from sun, rain, and seasonal temp variations. All plastic will breakdown and decay given enough time. Even the pressure from the compost upon the wall of the plastic bin are harmful to it.
greenhavenrdgarden
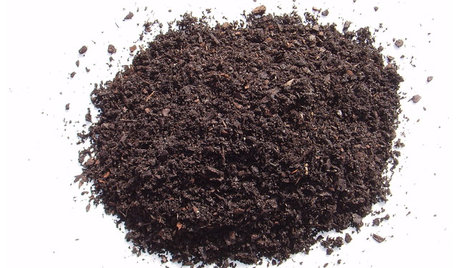
Original Author12 years agolast modified: 9 years agoHi all! Thought I would post a follow up about the composter. I managed to fill the bin with leaves and kitchen scraps. After reading Composting For Dummies I realized that I hadn't added any water (besides some wet coffee grounds occasionally) and my bin was kind of dry so I went out today to empty the bin and start all over. I was STUNNED to find a large amount of beautiful compost. I wasn't expecting any yet-especially bc the bin was so dry. The middle was damp and making some great stuff. Most of the scraps were completely broken down. I pulled out the compost and added back the unfinished leaves and am starting again but adding some liquid this time. Thanks for everyone's help. I'm using several piles now-trying different methods-and really enjoying composting!
As for this particular bin.... Pricey yes but makes beautiful compost for a completely closed bin. I think the 'lung' really works. It's LARGE yet sleek looking. My husband wants me to buy another (he hates the wire bins!). No regrets with my purchase!!
By the way, to the poster above-thank goodness I don't have bears here. That would scare the heck out of me!! We have lots of animals but the scariest are coyotes and the evil deer that eat my flowers! Lol.bi11me
12 years agolast modified: 9 years agoYep, hooked another one. I predict a full-blown whacko, with 3 bins and a plastic tote in the back of the car by November. In two years they'll be looking at used pick-up trucks for hauling manure and other peoples' bagged leaves...
Laurel Zito
12 years agolast modified: 9 years agoEveryone one needs two bins. One for the newer and one for the older compost. Two bins is the minimum. If you add coffee from starbucks, you don't need water at all. I might ad one cup of water 8 oz from time to time, but don't just turn the hose on inside the bin. I can see all that padding means faster compost. I want one, but I still don't want a closed bin. I want it open to the ground to drain out water. That is one reason, I did not buy that one.
greenhavenrdgarden
Original Author12 years agolast modified: 9 years agoI am hooked you are right! I only have my coffee grounds and that's about 2 pots a day. This composter is up to my shoulders so that's not quite enough liquid I've learned for such a large amount of leaves/scraps. The liquid does drain out of the bottom with this composter. It goes into a reservoir that they claim is compost tea but someone here explained its not actually so I just drain it out into the ground. Im actually planning on many different composters/styles! This stuff is wonderful!! Thanks again for all the help! :)
Laurel Zito
12 years agolast modified: 9 years agoGreen Haven you are doing great, I am bumping up your thread so someone else can see it. I still want one of these, but I also want one that is round but closed. I noticed from the link that your appears to be a square bin. This would be great for my ant problem. But, what about worms? It might work out, if I just did not have worms. I could get this bin for the fresh stuff to keep ants out of it. Then after it is more broken down and ants won't like it, then it can go in the open bottom bins for the worms to have at it. Rounds bins are faster. I had two square bins and I did not like them.
Julie Poché
4 years agoCan you give an update? I'm about to add this composting bin to my "cart". I have no place to hide a pile and my shoulder is weak for a turning bin. This bin is so appealing to me!
HU-264181361
3 years agolast modified: 3 years agoI convinced my parents to get this bin. It’s easy and clean which is good For them. I’m the one who empties it and balance it when I go over. I’ve emptied it twice and here’s what I’ve noticed:
the first round looked good, but it still had a lot of pockets of dry leaves. I didn’t see rotting food so I proceeded to move it to the plot i was remediating. when I did find rotting food from the top I threw it back in at the end.
we went a long time without emptying it after that... maybe a year and a half or more. It continuously filled up and sunk down as it decomposed. I decided it was time to empty it before the winter and it smelled more than I expected (ammonia, like a bog). it was also dense at the bottom. The reason for this was because it wasn’t able to breathe. the lung works, but it can only do so much. Don’t let it fill up and become too dense. It won’t break down as well and it’ll be harder to get out. still, I moved it to the empty plot where it’ll adjust more over winter.
in the end, it’s good for my parents who just need a place to put food scraps and yard waste without worrying about peats, odor, turning, etc.


greenhavenrdgardenOriginal Author