


Need help with raised bed plan
roongarn
18 years ago
Related Stories

REMODELING GUIDESKey Measurements for a Dream Bedroom
Learn the dimensions that will help your bed, nightstands and other furnishings fit neatly and comfortably in the space
Full Story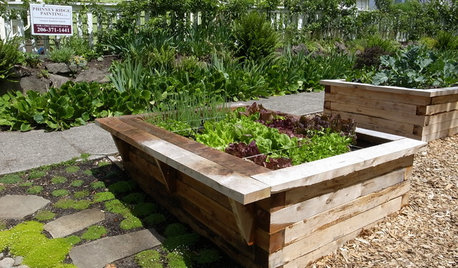
FARM YOUR YARDHow to Build a Raised Bed for Your Veggies and Plants
Whether you’re farming your parking strip or beautifying your backyard, a planting box you make yourself can come in mighty handy
Full Story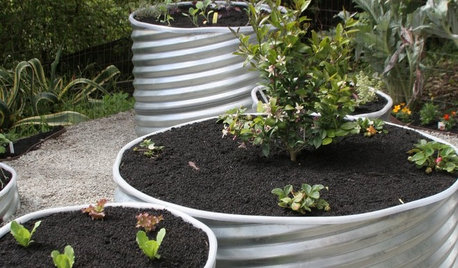
GARDENING GUIDES8 Materials for Raised Garden Beds
Get the dirt on classic and new options for raised vegetable and plant beds, to get the most from your year-round garden
Full Story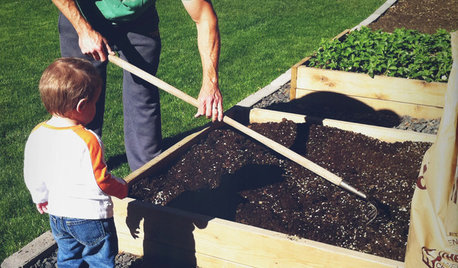
GARDENING AND LANDSCAPINGBuild a Raised Bed to Elevate Your Garden
A bounty of homegrown vegetables is easier than you think with a DIY raised garden bed to house just the right mix of soils
Full Story
ORGANIZINGDo It for the Kids! A Few Routines Help a Home Run More Smoothly
Not a Naturally Organized person? These tips can help you tackle the onslaught of papers, meals, laundry — and even help you find your keys
Full Story
LIFEDecluttering — How to Get the Help You Need
Don't worry if you can't shed stuff and organize alone; help is at your disposal
Full Story
LIFE12 House-Hunting Tips to Help You Make the Right Choice
Stay organized and focused on your quest for a new home, to make the search easier and avoid surprises later
Full Story
GARDENING AND LANDSCAPINGRaise Backyard Chickens Without Ruffling Neighbors' Feathers
Before you build a coop in the backyard, follow these strategies to help keep your neighbors from squawking
Full Story
UNIVERSAL DESIGNMy Houzz: Universal Design Helps an 8-Year-Old Feel at Home
An innovative sensory room, wide doors and hallways, and other thoughtful design moves make this Canadian home work for the whole family
Full Story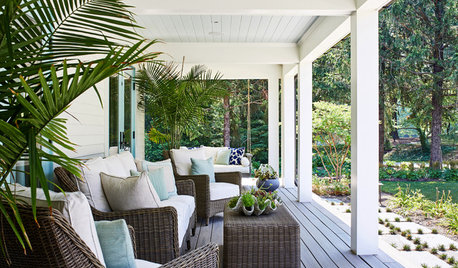
STANDARD MEASUREMENTSThe Right Dimensions for Your Porch
Depth, width, proportion and detailing all contribute to the comfort and functionality of this transitional space
Full Story
oregon_veg
roongarnOriginal Author
Related Professionals
Wrentham Landscape Architects & Landscape Designers · Finneytown Landscape Architects & Landscape Designers · Alexandria Landscape Contractors · Bethlehem Landscape Contractors · Chattanooga Landscape Contractors · Fort Atkinson Landscape Contractors · Los Banos Landscape Contractors · Mastic Beach Landscape Contractors · Merced Landscape Contractors · Middle River Landscape Contractors · North Haven Landscape Contractors · Pleasant Prairie Landscape Contractors · Columbia Fence Contractors · League City Fence Contractors · Mount Pleasant Fence ContractorsRay Scheel
roongarnOriginal Author
Ray Scheel
rfjcal
MadMIke
Texas_Mom_424
josette_sc
jimla
delta_charlie
thebug1971
UpstateNYgardener
margarita10
Ray Scheel
beeziboy
rain1950
beeziboy
smokey27
rembetika
Demeter