


Terrarium in a large lab flask -- a saga
I'm greatly enjoying this site and its friendly group of knowledgeable enthusiasts and enthusiastic novices. I'd like to share my first terrarium experience with you and get your input.
I was a total novice but I got hooked when I came by a 5 L cell culture flask, a 9-10" diameter flat-bottom globe with a short, narrow neck (~ 2" inner diameter), that I thought would make a great terrarium. So, armed with lay-press opinions from Googling I went with the multiple layers modality: a layer of mini-tiles that had been knocking around the basement since before the Flood, activated charcoal (I contained it in 2 well-washed Blanton�s bourbon bags), an inch of sphagnum, an inch of soil mixed with activated charcoal, followed by ~2" of commercial potting soil. This filled more than half the globe! (Duh.) Also, I hadn't realized that with this much substrate I would want the surface to be sculpted in an interesting way. Nonetheless, undeterred, I planted this setup with backyard pleurocarp-type moss (yet to be keyed out; resembles Hypnum cupressiforme), two small acrocarp cushions obtained at a local nursery, three micro-mini Sinningia muscicola "Rio das Piedras" (from blackjungleterrariumsupply.com), a mini-Sinningia (HCYs Taurus from violetbarn.com), the dwarf form of Lemmaphyllum microphyllum (from rareferns.com), and the dwarf Begonia dregei (from the local university hort club sale). Also included were a couple of "logs" of cork bark and a few stones. I had not decided on how to maintain moisture in this thing and was keeping it on the wet side. (The cushion mosses never thrived, eventually died, and were removed. I sort of knew this was a bad choice but tried it anyway b/c it added such a cool texture to the scene. My bad.) I should note that this terr is in a window which faces northwest and gets only indirect light. So there was no issue with heat buildup (and the plants were chosen with this lighting and humidity in mind). My m.o. was to water when fogging on the cool side was disappearing, but I think it took awhile to equilibrate and I was actually watering too much (distilled water of course). I would also rotate the terr a quarter turn every day to even out light exposure and condensation development.
As I'm sure you all immediately realized, this container geometry is a bear to work with. I made a cool watering device from a squeeze bottle and a bent ca. 12" stainless-steel straw connected via flexible tubing (The 1st picture shows my implements). My other tools include long forceps (from avogadro-lab-supply.com; I got the ginormous one for a tall deep terr but use it here sometimes) and several coat-hanger creations that variously have hooks, loops, or frayed ends. Pretty crude; however these serve as diggers, planters, draggers, removers, fungus tampers (more about that later), algae squeegees (more later), and glass cleaners and can be flexed as needed for the job at hand. It can be useful to wrap Velcro hook tape around the end of a tool for snagging debris from the wall of the flask. I bought a long pair of curved aquascape scissors on eBay, but I wish they had more of an angle and could reach farther. The Begonia dregei was planted in the center partly because I knew it would need pruning (the scissors are great for this), and the micro-Sinningias are not far away, but it's still a challenge to remove nascent seed pods from them. I'm still in search of a good solution for cutting nearer the edge of this container (a scalpel taped to one of my tools didn't work: I need the blade to act against a hard surface). My husband constructed a pair of long, angled forceps; and as proof of principle they're great and have the reach I need. However, they are limited by not gripping tightly, and the ends have an annoying habit of catching on the nuts at the angle and even crossing over each other. Version 2 will address these issues. He also made a different version from thin, springy iron strips, which are useless for picking up stuff but I have used them for delivering small loads of soil. So the tools are still a work in progress, and I would welcome any ideas you might offer. (Subsequently I made a terr for my sister and definitely went for a container I could stick my hand into!)
So, to continue the saga, the micro-Sinningias keep blooming (I love those little guys, they're so reliable!) and the mini did once. Also, some ferns volunteered from spores in one of the dying acrocarp mosses. I got a big kick out of watching prothalli produce gametophytes followed by emerging sporophyte fronds. I'm sure I learned about this in school sometime way back in the dark ages, but it was fun to watch the process unfold. Then we went out of town for 3 weeks, and I asked a colleague to look out for the terr; showed him how I would lightly sprinkle water when condensation had disappeared. After we returned, he mentioned that he might have overwatered. Yup. I upended the thing over a bucket and drained out 2.2 liters of water. All of the plant roots kept the top layer intact, but the whole mass slid and buckled a bit, creating the terrascaping I should have done in the first place! Now the challenge was to get the terr dried out and develop a protocol for minimal watering. I never planned for this to be a completely closed system (although there's no real reason why it couldn't be, with the plants I had). It was during this phase that I periodically got an algal film on the walls where the exuberant moss touched it. And if I didn't watch out, some white fuzzy character would develop. This made sense, because the edge continually received draining condensation. Rotating the terr daily helped mitigate this problem, but aggressively disturbing the algae and fungus was key to control, I think. So what I did was wrap tissue around the end of one of my tools or clasp a roll of tissue in the custom-angled forceps, soak with Purell, and use this to push the algal film down, pull the moss a little away from the wall, and blot at the fungus. Frankly I doubt that the Purell really does much to either the fungus or the alga when just being dabbed on with a gooey-wet tissue roll (it's just an alcohol-containing gel and works by dehydrating bacterial cells and disrupting membranes of membrane-bound viruses). But that�s what I've always done, and I don't think it hurts. I think what I was doing was just my variant of the measure Diana described in her wonderful terr how-to post. Another time when we left town for 3 weeks (and I didn't enlist help from a colleague), the terr developed a serious enough case of algae and fungus (only on the "cool" side away from the window) that more drastic action was called for. I squeegeed as above and then went in with my rough-ended coat-hanger tool and gouged out masses of interconnected biofilm, moss, fungus, and soil along the wall of the container. A lesson I've learned is that when moss gets to the edge, you're courting algae and fungus. A pebble barrier might help (and maybe I'll include this feature in future terrs dominated by moss), but I suspect moss will eventually flow right over and I will still need to pull it out occasionally.
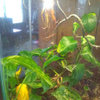
Over the ensuing weeks I grew unhappy with the mini-Sinningia. It clearly needed more sun and got leggy; and when not pruned, it began to dominate a good third of the terr, plus it no longer redeemed itself by flowering. So it came out. Also, each new frond of the volunteer ferns was larger than the last, and that side of the terr was getting crowded. So they came out. Several maidenhair ferns subsequently volunteered but weren't allowed to get as far as the first fern (I wasn't able to identify that fern). I thought I wanted something leafy where the mini-Sinningia had been and tried an oakleaf fern (Quercifilix zeylanica, from blackjungleterrariumsupply.com). This just wasn�t a pleasing addition: its leaves (fronds) were too big compared to those of the other plants, reminding me of some kind of lettuce. So it's gone too (but I liked it enough to keep it and see if it will make a pretty groundcover for a houseplant). In the end, I foraged three more pleurocarp mosses from the back yard for textural variety (yet-to-be-IDed: one resembles Entodon seductrix, one Hypnum imponens, and one looks like a Fissidens [pocket moss - the darker green moss in picture 6]). I would like to have more S. muscicola scattered about but that's not going to happen until I can groom and cull more easily in this terr. I should note that every time I have to remove something big from the terr, it's a traumatic event for the centrally located begonia, whose leaf attachments are very fragile. However, that plant is a trooper and keeps plugging along.
The other photos (in the Gallery if I can't figure how to embed more than one picture in a message) show the terr in its current state, a year and a half down the road. It's taking on a naturalistic look with the moss truly colonizing the cork logs. Most recently, I had not watered for over 2 months before condensation was diminishing and I was concerned that some of the moss was getting a brown tinge. So I sprinkled some water around. Not good. Should have inspected more carefully first and applied brain - I think the terr was fogging less b/c it was partially shaded by a zebra basket plant that I had placed on the window sill in front of it!! ZBP now moved, and I already know how to dry out the terr. So it goes!

miniplants Central KY 6a windowsill-growerOriginal Author
Related Professionals
Brockton Landscape Contractors · Lexington Landscape Contractors · Seminole Landscape Contractors · Siloam Springs Landscape Contractors · Wanaque Landscape Contractors · Chandler Fence Contractors · Fort Lauderdale Fence Contractors · Holbrook Fence Contractors · Milwaukie Fence Contractors · Lemont Window Contractors · Vashon Window Contractors · Ames General Contractors · Coshocton General Contractors · Oxon Hill General Contractors · Wright General Contractors