


Hypertufa Party at Shirley's ... long w/pix and tips
roselee z8b S.W. Texas
12 years ago


Featured Answer
Sort by:Oldest
Comments (25)

soxxxx
12 years agolast modified: 9 years agorock_oak_deer
12 years agolast modified: 9 years agoRelated Professionals
Edmond Landscape Architects & Landscape Designers · Hershey Landscape Architects & Landscape Designers · Oatfield Landscape Architects & Landscape Designers · Saint Charles Landscape Architects & Landscape Designers · Waunakee Landscape Architects & Landscape Designers · Bellefontaine Neighbors Landscape Contractors · Brownsville Landscape Contractors · Lees Summit Landscape Contractors · Lyndhurst Landscape Contractors · Newnan Landscape Contractors · Salem Landscape Contractors · West Allis Landscape Contractors · Palos Hills Landscape Contractors · Carol City Window Contractors · Farragut Window Contractorspjtexgirl
12 years agolast modified: 9 years agosoxxxx
12 years agolast modified: 9 years agocarrie751
12 years agolast modified: 9 years agorock_oak_deer
12 years agolast modified: 9 years agobossjim1
12 years agolast modified: 9 years agopjtexgirl
12 years agolast modified: 9 years agocarrie751
12 years agolast modified: 9 years agosoxxxx
12 years agolast modified: 9 years agoplantmaven
12 years agolast modified: 9 years ago
roselee z8b S.W. Texas
12 years agolast modified: 9 years agopjtexgirl
12 years agolast modified: 9 years agorock_oak_deer
12 years agolast modified: 9 years agohoneybunny2 Fox
12 years agolast modified: 9 years agorock_oak_deer
12 years agolast modified: 9 years agorock_oak_deer
12 years agolast modified: 9 years agoroselee z8b S.W. Texas
12 years agolast modified: 9 years agohoneybunny2 Fox
12 years agolast modified: 9 years agorock_oak_deer
12 years agolast modified: 9 years agohoneybunny2 Fox
12 years agolast modified: 9 years agoroselee z8b S.W. Texas
12 years agolast modified: 9 years agorock_oak_deer
12 years agolast modified: 9 years agohoneybunny2 Fox
12 years agolast modified: 9 years ago


Related Stories

KITCHEN DESIGNKitchen Counters: Durable, Easy-Clean Soapstone
Give bacteria the boot and say sayonara to stains with this long-lasting material that's a great choice for kitchen and bath countertops
Full Story
HOUSEKEEPING7-Day Plan: Get a Spotless, Beautifully Organized Living Room
A task a day sends messes away. Take a week to get your living room in shape
Full Story
THE HARDWORKING HOMESmart Ways to Make the Most of a Compact Kitchen
Minimal square footage is no barrier to fulfilling your culinary dreams. These tips will help you squeeze the most out of your space
Full Story
SUMMER GARDENINGHouzz Call: Please Show Us Your Summer Garden!
Share pictures of your home and yard this summer — we’d love to feature them in an upcoming story
Full Story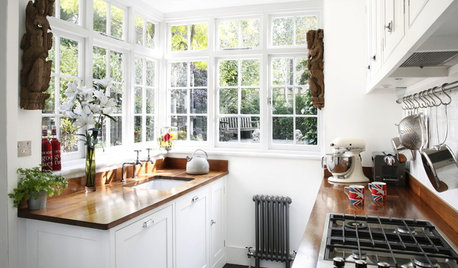
SMALL KITCHENS10 Things You Didn't Think Would Fit in a Small Kitchen
Don't assume you have to do without those windows, that island, a home office space, your prized collections or an eat-in nook
Full Story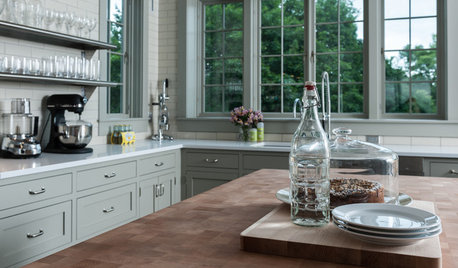
MOST POPULARKitchen Evolution: Work Zones Replace the Triangle
Want maximum efficiency in your kitchen? Consider forgoing the old-fashioned triangle in favor of task-specific zones
Full Story
ENTRYWAYSNo Entryway? Create the Illusion of One
Create the feeling of an entry hall even when your door opens straight into the living room. Here are 12 tricks to try
Full Story
DECORATING GUIDESThe '70s Are Back. Can Ya Dig It?
No need to cringe. These 21 groovy blasts from the past are updated to look fabulous today
Full Story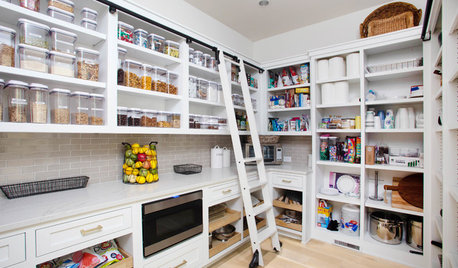
KITCHEN DESIGN9 Questions to Ask When Planning a Kitchen Pantry
Avoid blunders and get the storage space and layout you need by asking these questions before you begin
Full StoryMore Discussions

roselee z8b S.W. TexasOriginal Author